Oral Health-III

ORAL HEALTH = OVERALL HEALTH

We try to inspire people to just take control of their oral health because if you don’t take of your oral health, it affects so many different aspects of everyone’s lives. If your smile and mouth are not together, it affects your relationship, your self-esteem, and your health.   

Oral health is a reflection of the physiological, social and psychological factors that are essential to our quality of life


Image result for pic of oral health


Poor oral health care can result in poor overall health.

You don’t have to brush your teeth… …Just the ones you want to keep !!!

Don’t rush when you brush.

Better Teeth Better Health

Smiles are always in fashion

A smile is a curve that sets everything straight

A genuine smile comes from the heart, but a healthy smile needs good dental care

Smiles are great investments. The more you collect the better you feel.

Remember dentistry is not expensive … Neglect is

Smile it raises your face value

Smile, it lets your teeth breathe

Keep a smile on your face and let your personality be your autograph

Smile, It’s free therapy

Smile. It is the key that fits the lock of everybody’s heart

A warm smile is the universal language of kindness

Laughing cheerfulness throws the light of the day on all the paths of life

Smile at the obstacle, for its a bridge

Keep Smiling. It makes people wonder what you’re up to

Your smile will give you A Positive Countenance that will make people feel comfortable around you

A baby’s smile is an antidote to meet your day’s stress away

Image result for oral health quotes

Oral Health Tips – 

Brush with fluoride toothpaste and a soft-bristled toothbrush after a meal or at least twice a day

Floss daily right before bedtime

Eat a well-balanced diet; this helps keep your teeth and gum healthy

Don’t Smoke or Use Tobacco

Limit between-meal snacks, especially those sugar

Drink plenty of water

Be Flawless not Floss less

Have your mouth checked regularly by a  dentist

Replace your toothbrush every three months or sooner if the bristles begin to worn out


Image result for images of oral health

Do’s and Don’ts of Oral Hygiene

The Do’s of Oral Hygiene

To maintain a proper level of oral hygiene take the following actions – 

  • Do use a soft-bristled toothbrush. These bristles are easier on gums and they make it easier to reach under the gums.

  • Do be sure to brush your teeth at least twice a day. While brushing after every meal is optimal, brushing twice a day should suffice.

  • Do clean your gums and your entire mouth, not just your teeth.

  • Do make sure to floss as well. It’s important for keeping both your teeth and your gums healthy.

  • Do eat healthier and avoid foods that can cause tooth decay. Eat a mouth-healthy diet! Indulge yourself in foods such as whole grains, fruits, vegetables, lean meats, and of course, water!

  • Do take steps to stop any nighttime teeth grinding. While you won’t be able to cure it on your own, it’s best to talk to your dentist about it to determine what your best method of treatment will be.

  • Do go to the dentist once every six months. Not only will you get your teeth cleaned, but the dentist will be able to check your mouth for tooth decay, gum diseases, or any other potential problems.

The Don’ts

Following habits, you should not follow – 

  • Don’t use a hard-bristled toothbrush. These bristles can sometimes be painful and even cause the gum line to recede.

  • Don’t take a brushing session off. Even if you’re busy or feeling tired, make sure to brush at least twice a day.

  • Don’t skip flossing. Flossing is a vital part of oral hygiene and it’s helpful for dislodging food particles trapped between your teeth.

  • Don’t forget to wear a mouth guard if you’re going to play a sport with the potential for dental injuries.

  • Don’t smoke. This can discolor your teeth and increase the likelihood of tooth decay.

  • Don’t ignore your diet. Eating too many acidic or sugary foods can cause tooth decay and other oral problems.

  • Don’t wait to see your dentist if you have bleeding gums, tooth sensitivity, or any other oral issues. Toothaches can be a sign of a more serious dental issue. See your dentist as soon as you discover changes in your dental health.
  • Go overboard with bleaching! Over-bleaching your teeth can make them very sensitive to hot and cold foods, thus causing a variety of other problems.

Image result for images of oral health

Mouth wash and other basic hygiene – 

  • While using mouthwash, one should keep swish the solution in your mouth for 30 – 60 seconds.
  • There are different mouthwashes for different functions: an antiseptic one to kill the bacteria, fluoride wash to reduce the chances of caries, an extra-strength mouthwash for bad breath. Evaluate your needs and use them accordingly. Mouthwash is not a substitute for brushing.
  • Try to rinse your mouth after each meal to make there is no food stuck in your teeth.
  • Floss, while not popular in India, helps in keeping the teeth healthy. It cleans out the space between teeth that the bristles of the brush cannot reach.
  • Try avoiding hard candies and other acid-producing foods
  • Sugary sweets are best eaten in the daytime.
  • Avoid tobacco, caffeine and carbonated drinks
  • Visit your dentist once in six months as a part of your regular schedule. Don’t wait till toothaches or other obvious symptoms to see your dentist.

With a little effort and a little discipline, you can make sure to have the sparkling white teeth seen in the advertisements, without the CGI.


Oral Health-II

oral health


Oral Health & Common Prevention –

All of these common dental problems can be prevented and kept at bay with very simple day-to-day oral hygiene measures. Brushing in the morning and before bed alone won’t be enough to make sure your oral health is on tip-top shape.

Much like everything else, you have to spend some money on your dental needs. Pay your dentist a visit regularly. Get your teeth checked and cleaned on a regular basis as well. These might be simple steps but you lessen the chances of you getting dental problems that can lead to something worse.

Aside from these, limit your intake of foods that will contribute to the build-up of plaque on your teeth like the following:

  • Sweets – hard or soft candies, caramel, chocolate, cookies, etc.
  • Carbonated drinks – they’re very high in sugar which bacteria feeds off of
  • Snacks – most store-bought snacks have loads of sugar, sodium and other preservatives that are harmful to your teeth enamel

If you’ve been smoking for a while now, you might want to start decreasing your nicotine intake. Smoking leads not only to teeth stains but can lead to oral, throat, and lung cancer as well. If you don’t smoke, keep it that way.

For those who are heavy drinkers by habit, drink in moderation. Alcohol also contributes to many dental problems especially if you don’t have a habit of brushing after.

Develop and religiously practice a healthy dental habit as well. Expand to more than just brushing your teeth in the morning and before bed. Include flossing every other day and gargling with mouthwash after you brush to help get rid of bacteria.

And, as basic as this sound, drink more water. Water helps keep your mouth hydrated and clean. Also, use a toothpaste brand that’s high in fluoride. That will help strengthen the enamel around your teeth!

Conclusion –

Dental problems can be prevented and completely avoided if you be responsible for your oral health. If you take hours a day in the gym to keep your figure, you should show the same dedication to your oral hygiene. Keeping your oral health up by staying away from food that contributes to plaque build-up is also a step in taking care of your fitness. That’s hitting two birds with one stone!

Also, if you notice any abnormalities with your oral health, it’s always advisable to consult your dentist for early prevention. Don’t ignore a small growth, consistent mouths sores, toothaches, or even something as simple as bad breath. Prevention is better than cure.

All in all, this boils down to discipline, self-control, and responsibility.

Image result for images of oral problems prevention

Click here for Preventing and treating common dental problems-

For most people, the basics of good dental hygiene are taught from a very early age – and with good reason. Teeth serve multiple purposes, all of which are important to vary degrees. A person’s ability to masticate is perhaps the primary reason for teeth, as it helps make the digestion of food possible.

One’s appearance, from their smile to the shape of their face, is also dependent on their teeth. As useful and important as teeth are, however, they are not indestructible. In fact, they are susceptible to a number of problems that can potentially result in their loss. Fortunately, these problems are often preventable if a person adheres to good dental habits. To develop these habits, it is important to understand what the potential threats are and how to avoid them.

Bad Breath

Halitosis, which is commonly known as bad breath, is a problem in which a person’s breath has an unpleasant or foul odor. Problems with bad breath may be caused by a number of things, such as lingering food particles in the mouth, recently eaten malodorous food items, dryness of the mouth, poor dental hygiene, mouth infections, or illness.

Resolving bad breath is dependent on its cause. For some, bad breath may be resolved by simply brushing the teeth to remove plaque buildup and brushing the tongue with a toothbrush or tongue scraper to remove bacteria. When dental disease or infection is the source, treatment by a dentist may be necessary.

Good dental hygiene is also an important part of preventing bad breath. In addition, toothbrushes should be replaced every three months, and people should schedule regular dental exams and cleanings. Bad breath caused by dry mouth may be prevented by chewing on gum or drinking water at regular intervals.

Gum Disease

The gums are the tissue inside the mouth that serves as a support for the teeth. When they become infected due to toxins produced by plaque, it is called periodontal disease, commonly known as gum disease. There are two basic types of gum disease: gingivitis and periodontitis. Of the two, gingivitis is a milder form and is reversible.

When people have gingivitis, they may notice that their gums are red and swollen, and at times, there may be some bleeding. Periodontitis occurs when gingivitis is left untreated. It is an advanced stage of gum disease in which plaque spreads beyond the gum line.

When a person has this type of gum disease, bacteria can cause deterioration of the gums and destruction of tooth-supporting bones. In addition, it can lead to loose teeth and/or tooth loss.

Prevention is key when it comes to gum disease. Proper brushing and flossing techniques to remove plaque and bacteria are important. Teeth should be brushed after meals, and one should floss between the teeth at least once a day to remove hidden debris and plaque.

People with certain health conditions, such as diabetes, should talk with their dentist about their health and the risk of gum disease. Proper maintenance of these health conditions may also help reduce the risk of gum disease. Treatment of gum disease ranges from non-surgical procedures to treatments that require surgery.

Surgical procedures include gum graft surgery and periodontal pocket reduction. Non-surgical treatments include scaling and root paining and antibiotics to treat any infection.

Tooth Sensitivity

The sensitive nerves of the teeth are covered by a layer called dentin. Dentin may become exposed due to factors such as receding gums and/or gum disease, age, overzealous brushing, or even tooth-whitening products. Once the dentin exposure happens, a person can experience irritation or pain from eating foods that are sweet, hot, cold, or acidic. Even breathing in very cold air can cause pain.

This is a condition that is called tooth sensitivity. The pain that people feel is due to the many microscopic channels in the dentin that lead to the inner part of the tooth called the pulp. A tooth’s pulp is made up of nerves and blood vessels. When the dentin is exposed, the nerves become irritated when certain foods are eaten.

Fortunately, tooth sensitivity is preventable with good oral care. By properly brushing with a soft-bristled toothbrush, flossing one’s teeth, and reducing the consumption of acidic and sugary foods, it is possible to prevent the recession of gums that leads to sensitivity.

If the sensitivity of the teeth is already a problem, treatment is required. A dental appointment will be necessary to determine the actual cause of sensitivity. Treatment may involve at-home solutions, such as using a fluoride rinse or brushing with a desensitizing toothpaste or a high-fluoride toothpaste. In-office treatments may include fluoride varnishes over the root surface, fillings to cover the exposed roots or the use of plastic resin or dentin sealers.

Yellow Teeth

Tooth discoloration, or yellowing of the teeth, is a condition in which the teeth become stained or discolored. There are numerous potential causes for tooth yellowing, including excess fluoride, plaque and/or tartar buildup, aging, smoking, medications, or certain types of food. Preventing yellowing of the teeth is not always possible, particularly when it is associated with genetics.

For other people, yellowing may be prevented by avoiding certain foods that are acidic or foods that are high in tannins and that may stain the teeth, or by making changes in lifestyle such as quitting smoking. Having the teeth cleaned every six months by a dental hygienist may also help to prevent teeth from turning yellow.

To treat this problem, a person may see their dentist about in-office teeth-whitening procedures. Over-the-counter teeth-whitening is also an option for many. Other options to discuss with a dentist are veneers or dental bonding for a more improved appearance.

Tooth Decay

When plaque forms on the teeth, it produces acids. These acids, which are sticky, adhere to the teeth, and attack the enamel. If not properly removed, the plaque can damage the tooth enamel. This condition is called tooth decay, and if it is left untreated, it can result in cavities or small holes in the teeth.

According to the University of Chicago Medicine, tooth decay is a disease that is so prevalent that only the common cold is more common. Tooth decay is caused by improper brushing or failure to regularly brush one’s teeth, health conditions such as diabetes, consuming sugary foods, dry mouth, and smoking. Lack of fluoride also contributes to dental decay.

Tooth decay is highly preventable with basic oral maintenance, such as flossing daily and brushing the teeth for two minutes following every meal or, at minimum, twice a day. When brushing one’s teeth, fluoride toothpaste is important, as the fluoride helps teeth resist decay by hardening the enamel.

Treatment of mild tooth decay may be resolved by improving one’s habits in terms of dental hygiene and the use of a daily fluoride mouth rinse. If tooth decay has led to the formation of cavities, it may require treatment based on its severity.

Treatment options include removing the decay and filling the hole with a dental filling, replacing a part of the tooth with a crown, or removing infected pulp during a procedure known as a root canal. Tooth decay may become so bad that these treatment options are not viable. When this is the case, the dentist may suggest removing the tooth altogether.

Tooth Erosion

Tooth enamel is the hardest substance in the human body; however, acids from bacteria and certain food and drink are corrosive and can begin to wear away tooth enamel. When this happens, it is called tooth erosion. In addition to bacteria and acidic food and drink such as sodas and juices, tooth erosion may also be caused by digestive problems such as vomiting, as stomach acid is highly corrosive.

This is particularly problematic for people who suffer from disorders or illnesses that cause frequent bouts of vomiting. Tooth erosion may be exacerbated by dry mouth, as saliva works to neutralize teeth-corroding acids in the mouth.

Brushing with a soft-bristled toothbrush after eating and drinking is only the first step in preventing tooth erosion. Eating a slice of cheese or drinking milk can help to neutralize acids in the mouth. Reducing the number of acidic drinks consumed is also a major preventative step. Saliva may also be stimulated by chewing a stick of gum. When buying chewing gum, sugar-free gums that contain xylitol are most effective and safest for the teeth.

 Mouth Sores

There are various types of sores that can appear on the gums, tongue, inner cheeks, lips, or at the bottom of the mouth. They can range from mild sores that appear due to irritation, such as biting one’s cheek, to more serious sores that are indicative of illness such as cancer of the mouth. The most common sores of the mouth include canker and cold sores.

Canker sores are non-contagious and may be caused by hormone changes, stress, a weakening of the immune system, certain health conditions, or a lack of vitamins such as iron or B12. These types of sores are more common in women than in men and have a yellowish appearance with a white center and a red outer ring.

Herpes simplex virus causes cold sores that, unlike canker sores, are highly contagious. These sores only appear on the mouth when triggered by stress, exposure to the sun, hormone changes, or fever and illness. This type of sore starts off as blister clusters before crusting over.

Prevention of mouth sores depends on the type of sore. People who frequently get sores from bites to the inner cheek can prevent them by chewing more slowly and carefully. Using care when drinking hot foods can help prevent sores from burns. Canker and cold sores may be prevented by reducing stress, which is a trigger for both. Antiviral medications may also be given to help prevent cold sores from appearing.

Treating simple sores that occur due to irritation typically involves soothing the irritation. A person may take over-the-counter pain relievers or gargle with cool or saltwater. Canker sores may be treated by applying a paste of baking soda and water. Icing cold sores and using over-the-counter creams and drying agents may also be helpful.

A doctor should be seen if it is a new sore with no apparent cause if the sore is accompanied by fever, difficulty swallowing or drooling. Sores that last for several weeks should also be seen by a doctor. Treatment by medical professionals depends on the type of sore and its severity.

 Toothaches

Pain that radiates from the teeth is called a toothache. There can be several causes for a toothache; however, one of the most common is caused by an inflammation of the pulp called pulpitis. Pulpitis is a result of tooth decay and cavities. Toothaches may also be caused by other problems, such as a wisdom tooth erupting, gum infections, or cracked or otherwise damaged teeth.

A toothache can be prevented when a person takes steps to prevent tooth decay and cavities. This includes brushing and flossing regularly and eating a healthy diet. If a person has a toothache, they should consult a dentist to determine the exact cause.

This is important, as a toothache that lasts could indicate that the tooth is dying and require immediate action. A toothache that is accompanied by swelling or fever could also indicate an infection that may spread. Dentists treat toothaches according to the underlying cause. Treatment may range from antibiotics to tooth extraction.

Tooth Crowding –

Tooth crowding isn’t only an aesthetic dental problem. It can cause alignment issues that eventually can cause temporomandibular jaw disorder or TMJ. Misaligned bites can cause jaw problems that might need surgery to fix.

Fixing tooth crowding would be the best way – through the lengthy procedure – prevent jaw disorders and misaligned bites. This naturally for many. When baby teeth fall out and new teeth come out in a peculiar position, crowding may ensue. Teeth also shift without the person knowing so it may eventually result in getting them realigned.

Braces are the go-to treatment for teeth crowding with severe realignment needed. Depending on the crowding, orthodontists might even suggest extraction to make room for teeth to shift. If it doesn’t require extensive realignment, one might opt for clear aligners called Invisalign.

It requires more discipline since they need to be taken out when eating, cleaned before putting them back on, and replaced every fortnight. But, for those who don’t want the aesthetic disadvantage of mental braces, this would be the way to go.

Visit an orthodontist to see if you have teeth crowding.

Root Infection –

If you’ve heard of or tried a root canal treatment, then you know a root infection is a serious problem. It’s painful and very uncomfortable. Root infection occurs when bacteria infect the root part of your tooth. It enters the center of your tooth and attacks the pulp tissue inside. You will experience what you might rule off as a generic toothache. Eventually, an abscess will form indicating that the root infection has developed to a more severe case. If you do not see any abscess but have persisting pain, visit your local dentist.

Possibly, a root canal procedure might be advised and though many people think it is a painful process, it’s actually not. Dentists give their patients anesthesia and one would hardly feel any pain. You would feel the movement and pressure of the tools but there won’t be any pain until the anesthesia wears off.

The healing part is where the pain comes in along with a bit of swelling that an ice pack can’t alleviate. During a root canal procedure, the dental surgeon or endodontist drills a hole through the middle of your tooth. He then takes a file to grind away the damaged surface and provide access to the root.

Once the opening has been made, a special suction tool is used to suck out all the pus and infected tissue. It is then sealed with a gutta-percha which is a hardening material that will keep bacteria from entering the root again as well as strengthen the tooth.

Oral Cancer –

Oral cancer is the deadliest dental problem one can encounter. A study done by the Oral Cancer Foundation shows the drastic numbers of oral cancer. Oral cancer is considered to be ahead and neck cancer. Of all the head and neck cancer cases in the United States, 85% of that is oral cancer.

In the US alone, approximately 54,000 diagnosed cases have been reported resulting in 13,500 deaths per year. The numbers alone are enough to emphasize the seriousness of this dental problem. Oral cancer death rates are higher than other kinds of cancer because it doesn’t present any pain or primary symptoms.

It starts with a small pinkish growth in the mouth. It’s unlikely to be noticed since our mouths don’t innately have smooth surfaces and are naturally pink or reddish in color. This is why a visit to your dentist will help. Dentists know what to look out for on regular check-ups and would be able to recommend further testing if needed.

Oral cancer is commonly caused by smoking and drinking. Smokers – heavy or light – need to undergo regular dental check-ups and cleaning to decrease the chance of getting oral cancer.  The same goes for those who like to indulge in alcoholic drinks.

Tooth Loss –

Many of the common dental problems we’ve already discussed can lead to tooth loss. The periodontal disease eventually leads to this if not treated immediately. Tooth decay can also lead to extraction if the tooth can no longer be saved. The same goes for root infections. Consequently, when this happens you only have two options: dentures or dental implants.

Of course, as we age, our teeth also weaken from all the years of chewing, biting, and grinding. Even if you don’t have any serious dental problems, you are still at risk of tooth loss because it does come with age. WHO’s (World Help Organization) study shows that 30% of people in the world who are between the ages of 65-74 have no natural teeth.

That’s the reason why seniors need dentures. Harsh truth but that’s the cycle of life. It’s not something to dread though. Because of dental technology and techniques innovations, it’s now possible to permanently restore teeth with dental implants.

Dental implants are permanently lodged into your jaw, making them durable, strong, and long-lasting. They look and feel like natural teeth and restores function completely. The procedure is done over several sessions to give the patient to heal but has been the choice of many older patients.

Of course, dentures are still an option for those who want a more affordable and quicker solution. There are partial and full dentures one can get depending on the severity of tooth loss.

Toothache and Dental Emergencies –

While many toothaches and dental emergencies can be easily avoided just by regular visits to the dentist, accidents can and do happen. Having a dental emergency can be very painful and scary. Common problems that require an urgent trip to your dentist include a broken or cracked tooth, an abscessed tooth, or a tooth knocked out in an accident.

Go to a hospital for trauma care if you have a fractured or dislocated jaw or severe cuts to your tongue, lips, or mouth. If you have a tooth abscess that is causing difficulty swallowing or you have developed a fever or facial swelling, get emergency care as well.

Unattractive Smile –

While an unattractive smile is not technically a “dental problem,” it is a major reason why many patients seek dental treatment. An unattractive smile can really lower a person’s self-esteem. Luckily, with today’s technologies and developments, anyone can have a beautiful smile.

Whether it’s teeth whitening, dental implants, orthodontics, or other cosmetic dental work, chances are that your dentist can give you the smile of your dreams.

Image result for images of oral problems prevention

Click here for Faq’s about going to the dentist –

Whether you are 80 or 8, your oral health is important. Did you know that 100 million Americans fail to see a dentist each year, even though regular dental examinations and good oral hygiene can prevent most dental disease? Here are some frequently asked questions about going to the dentist.

Why do regular dental visits matter –

Regular dental visits are important because they can help spot dental health problems early on when treatment is likely to be simpler and more affordable. They also help prevent many problems from developing in the first place. Visiting your dentist regularly is also important because some diseases or medical conditions have symptoms that can appear in the mouth.

What are some signs I should see a Dentist –

  • Your teeth are sensitive to hot or cold
  • Your gums are puffy and/or they bleed when you brush or floss
  • You have fillings, crowns, dental implants, dentures, etc.
  • You don’t like the way your smile or teeth look
  • You have persistent bad breath or a bad taste in your mouth
  • You are pregnant
  • You have pain or swelling in your mouth, face or neck
  • You have difficulty chewing or swallowing
  • You have a family history of gum disease or tooth decay
  • You have a medical condition such as diabetes, cardiovascular disease, eating disorders or are HIV positive
  • Your mouth is often dry
  • You smoke or use other tobacco products
  • You are undergoing medical treatment such as radiation, chemotherapy or hormone replacement therapy
  • Your jaw sometimes pops or is painful when opening and closing, chewing or when you first wake up; you have an uneven bite
  • You have a spot or sore that doesn’t look or feel right in your mouth and it isn’t going away

I’m not having any symptoms. Do I still need to see a dentist –

Yes. Even if you don’t have any symptoms, you can still have dental health problems that only a dentist can diagnose. Regular dental visits will also help prevent problems from developing. Continuity of care is an important part of any health plan and dental health is no exception.

Keeping your mouth healthy is an essential piece of your overall health. It’s also important to keep your dentist informed of any changes in your overall health since many medical conditions can affect your dental health too.

What can I expect during dental check-up –

The dentist or hygienist will ask about your recent medical history, examine your mouth, and decide whether or not you need x-rays. Depending on your treatment plan, the hygienist may use special dental instruments to check your gums for gum disease. Your dentist will evaluate your overall dental health and conduct an oral cancer screening by holding your tongue with gauze, checking it, and your whole mouth, then feeling your jaw and neck.

How often do I have to go to a dentist –

There is no one-size-fits-all dental treatment. Some people need to visit the dentist once or twice a year; others may need more visits. You are a unique individual, with a unique smile and unique needs when it comes to keeping your smile healthy.

How do I find a dentist –

Almost all countries have Dental Associations (DA) wherein they have registered dentists and classified state and city wise for search.

  • Ask family, friends, neighbors, or co-workers for recommendations.
  • Ask your family physician or local pharmacist.
  • If you’re moving, your current dentist may be able to make a recommendation.
  • Call or write your state/city dental society.

What should I look for choosing a dentist –

You may want to call or visit more than one dentist before making your decision. Dental care is a very personalized service that requires a good relationship between the dentist and the patient. During your first visit, you should be able to determine if this is the right dentist for you.

Consider the following: 

  • Is the appointment schedule convenient for you?
  • Is the office easy to get to from your home or job?
  • Does the office appear to be clean, neat, and orderly?
  • Was your medical and dental history recorded and placed in a permanent file?
  • Does the dentist explain techniques that will help you prevent dental health problems? Is dental health instruction provided?
  • Are special arrangements made for handling emergencies outside of office hours? (Most dentists make arrangements with a colleague or emergency referral service if they are unable to tend to emergencies.)
  • Is information provided about fees and payment plans before treatment is scheduled?
  • Is your dentist a member of the DA? All DA member dentists voluntarily agree to abide by the high ethical standards reflected in the member code of conduct. You and your dentist are partners in maintaining your oral health. Take time to ask questions and take notes if that will help you remember your dentist’s advice.

What’s the difference between BDS and DDS –

If you’re looking to find a dentist you may notice that while most are listed with a “DDS”, some may be listed as “BDS”. They both mean the same thing—your dentist graduated from an accredited dental school. The DDS (Doctor of Dental Surgery) and BDS (Bachelor of Dental Surgery) are the same degrees.

Dentists who have a BDS or DDS have the same education. The level of education and clinical training required to earn a dental degree, and the high academic standards of dental schools are on par with those of medical schools. Upon completion of their training, dentists must pass both a rigorous national written exam and a state or regional clinical licensing exam in order to practice.

In order to keep their licenses, they must meet continuing education requirements for the remainder of their careers so that they may stay up to date on the latest scientific and clinical developments. We also have masters/postgraduates ( MDS ) in dentistry. They have mastered one of the streams of Dentistry like Orthodontist, Endodontist, Periodontist Etc.

How can I maintain a healthy smile with my dentist’s help?

Here are some tips to help you take care of your smile:

  • Healthy habits. Brushing twice a day for two minutes and flossing daily are essential for everyone, no matter how unique your mouth is. It’s the best way to fight tooth decay and gum disease.
  • Build a relationship. Continuity of care is an important part of any health plan and dental health is no exception. When your dentist sees you regularly, he or she is in a good position to catch oral problems early. For instance, catching gum disease when it’s still reversible, or cavities when they are small and are more easily treated.
  • Maintain. Keeping your mouth healthy is an essential piece of your overall health. It’s important to keep your dentist informed of any changes in your overall health as well.
  • Talk about it! Only your dentist can determine what the best treatment plan is for you. Have questions about your oral health or certain dental procedures? Start a conversation. Ask your dentist to explain step-by-step. Dentists love having satisfied, healthy patients.


Image result for images of oral problems prevention

Oral Health-I

healthy life

Dental and oral health is an essential part of your overall health and well-being. Poor oral hygiene can lead to dental cavities and gum disease and has also been linked to heart disease, cancer, and diabetes.

Maintaining healthy teeth and gums is a lifelong commitment. The earlier you learn proper oral hygiene habits — such as brushing, flossing, and limiting your sugar intake — the easier it’ll be to avoid costly dental procedures and long-term health issues.

World Oral Health Day is celebrated on 20th March.

Facts about dental and oral health –

Dental cavities and gum disease are very common. According to the W.H.O. Trusted Source:

  • between 60 and 90 percent of school children have at least one dental cavity
  • nearly 100 percent of adults have at least one dental cavity
  • between 15 and 20 percent of adults ages, 35 to 44 have severe gum disease
  • about 30 percent of people around the world ages 65 to 74 don’t have any natural teeth left
  • in most countries, out of every 100,000 people, there are between 1 and 10 cases of oral cancer
  • the burden of oral disease is much higher in poor or disadvantaged population groups

There are many steps you can take to keep your teeth healthy. For example, dental and oral disease can be greatly reduced by:

  • brushing your teeth with a fluoride toothpaste at least twice a day
  • flossing your teeth at least once a day
  • decreasing your intake of sugar
  • eating a diet high in fruits and vegetables
  • avoiding tobacco products
  • drinking fluoridated water
  • seeking professional dental care

Symptoms of dental and oral problems

You shouldn’t wait until you have symptoms to visit your dentist. Going to the dentist twice a year will usually allow them to catch a problem before you even notice any symptoms.

If you experience any of the following warning signs of dental health issues, you should make an appointment to see your dentist as soon as possible:

  • ulcers, sores, or tender areas in the mouth that won’t heal after a week or two
  • bleeding or swollen gums after brushing or flossing
  • chronic bad breath
  • sudden sensitivity to hot and cold temperatures or beverages
  • pain or toothache
  • loose teeth
  • receding gums
  • pain with chewing or biting
  • swelling of the face and cheek
  • the clicking of the jaw
  • cracked or broken teeth
  • frequent dry mouth

If any of these symptoms are accompanied by a high fever and facial or neck swelling, you should seek emergency medical treatment. Learn more about the warning signs of oral health issues.

Causes of oral and dental diseases –

Your oral cavity collects all sorts of bacteria, viruses, and fungi. Some of them belong there, making up the normal flora of your mouth. They’re generally harmless in small quantities. But a diet high in sugar creates conditions in which acid-producing bacteria can flourish. This acid dissolves tooth enamel and causes dental cavities.

Bacteria near your gumline thrive in a sticky matrix called plaque. Plaque accumulates, hardens, and migrates down the length of your tooth if it isn’t removed regularly by brushing and flossing. This can inflame your gums and cause the condition known as gingivitis.

Increased inflammation causes your gums to begin to pull away from your teeth. This process creates pockets in which pus may eventually collect. This more advanced stage of gum disease is called periodontitis.

There are many factors that contribute to gingivitis and periodontitis, including:

  • smoking
  • poor brushing habits
  • frequent snacking on sugary foods and drinks
  • diabetes
  • the use of medications that reduce the amount of saliva in the mouth
  • family history, or genetics
  • certain infections, such as HIV or AIDS
  • hormonal changes in women
  • acid reflux, or heartburn
  • frequent vomiting, due to the acid

Diagnosing dental and oral diseases

Most dental and oral problems can be diagnosed during a dental exam. During an exam, your dentist will closely inspect your:

  • teeth
  • mouth
  • throat
  • tongue
  • cheeks
  • jaw
  • neck

Your dentist might tap or scrape at your teeth with various tools or instruments to assist with a diagnosis. The dentist will also take dental X-rays of your mouth, making sure to get an image of each of your teeth. Be sure to tell your dentist if you’re pregnant. Women who are pregnant shouldn’t have X-rays.

A tool called a probe can be used to measure your gum pockets. This small ruler can tell your dentist whether or not you have gum disease or receding gums. In a healthy mouth, the depth of the pockets between the teeth is usually between 1 and 3 mm. Any measurement higher than that may mean you have gum disease.

If your dentist finds any abnormal lumps, lesions, or growths in your mouth, they may perform a gum biopsy. During a biopsy, a small piece of tissue is removed from the growth or lesion. The sample is then sent to a laboratory for examination under a microscope to check for cancerous cells.

If oral cancer is suspected, your dentist may also order imaging tests to see if cancer has spread. Tests may include:

  • X-ray
  • MRI scan
  • CT scan
  • endoscopy

Types of dental and oral diseases

We use our teeth and mouths for a lot, so it’s not surprising how many things can go wrong over time, especially if you don’t take proper care of your teeth. Most dental and oral problems can be prevented with proper oral hygiene. You’ll likely experience at least one dental problem during your lifetime.

Cavities

Cavities are also called caries or tooth decay. These are areas of the tooth that have been permanently damaged and may even have holes in them. Cavities are fairly common. They occur when bacteria, food, and acid coat your teeth and form a plaque. The acid on your teeth starts to eat away at the enamel and then the underlying dentin, or connective tissue. Over time, this can lead to permanent damage.

Gum disease (gingivitis)

Gum disease, also called gingivitis, is inflammation of the gums. It’s usually the result of plaque building up on your teeth due to poor brushing and flossing habits. Gingivitis can make your gums swell and bleed when you brush or floss. Untreated gingivitis can lead to periodontitis, a more serious infection.

Periodontitis

As periodontitis progresses, the infection can spread to your jaw and bones. It can also cause an inflammatory response throughout the body.

Cracked or broken teeth

A tooth can crack or break from an injury to the mouth, chewing hard foods, or grinding the teeth at night. A cracked tooth can be very painful. You should visit your dentist right away if you’ve cracked or broken a tooth.

Sensitive teeth

If your teeth are sensitive, you might feel pain or discomfort after having cold or hot foods or beverages.

Tooth sensitivity is also referred to as “dentin hypersensitivity.” It sometimes occurs temporarily after having a root canal or a filling. It can also be the result of:

  • gum disease
  • receding gums
  • a cracked tooth
  • worn-down fillings or crowns

Some people naturally have sensitive teeth because they have thinner enamel.

Most of the time, naturally sensitive teeth can be treated with a change in your daily oral hygiene regimen. There are specific brands of toothpaste and mouthwash for people with sensitive teeth.

Shop for toothpaste and mouthwash made for people with sensitive teeth.

Oral cancer

Oral cancers include cancer of the:

  • gums
  • tongue
  • lips
  • cheek
  • the floor of the mouth
  • the hard and soft palate

A dentist is usually the first person to recognize oral cancer. Tobacco use, such as smoking and chewing tobacco, is the biggest risk factor for oral cancer.

According to the Oral Cancer Foundation (OCF), nearly 50,000 Americans will be diagnosed with oral cancer every year. In general, the earlier that oral cancer is diagnosed, the better the outlook.

The link between oral and general health

Oral health has risen in importance in recent years, as researchers have discovered a connection between declining oral health and underlying systemic conditions. It turns out that a healthy mouth can help you maintain a healthy body. According to the Mayo Clinic, oral bacteria and inflammation may be associated with:

  • heart disease
  • endocarditis, or inflammation of the lining of the heart
  • premature birth
  • low birth weight

Bacteria can spread from your oral cavity to your bloodstream, causing infective endocarditis. Infective endocarditis is a life-threatening infection of your heart valves. Your dentist may suggest you take antibiotics as a preventive measure before they perform any dental procedure that could dislodge bacteria in your mouth.

Treating Dental and Oral Problems –

Even if you’ve been taking good care of your teeth, you’ll still need to have a professional cleaning twice a year during a routine visit with your dentist. Your dentist will recommend other treatments if you show signs of gum disease, infections, or other problems.

Cleanings

A professional cleaning can get rid of any plaque you may have missed while brushing and flossing. It’ll also remove tartar. These cleanings are usually performed by a dental hygienist. After all the tartar is removed from your teeth, the hygienist will use a high-powered toothbrush to brush your teeth. This is followed by flossing and rinsing to wash out any debris.

Deep cleaning is also known as scaling and root planing. It removes tartar from above and below the gumline that can’t be reached during routine cleaning.

Fluoride treatments

Following a dental cleaning, your dentist may apply a fluoride treatment to help fight off cavities. Fluoride is a naturally occurring mineral. It can help strengthen the enamel of your tooth and make them more resilient to bacteria and acid.

Antibiotics

If you show signs of a gum infection or you have a tooth abscess that has spread to other teeth or your jaw, your dentist may prescribe antibiotics to help get rid of the infection. The antibiotic may be in the form of a mouth rinse, gel, oral tablet, or capsule. The topical antibiotic gel may also be applied to the teeth or gums during surgical procedures.

Fillings, crowns, and sealants

A filling is used to repair a cavity, crack, or hole in the tooth. The dentist will first use a drill to remove the damaged area of the tooth and then fill the hole with some material, such as amalgam or composite.

A crown is used if a large portion of your tooth needs to be removed or has broken off due to an injury. There are two types of crowns: an implant crown that fits over an implant, and a regular crown that fits over a natural tooth. Both types of crowns fill in the gap where your natural tooth appeared.

Dental sealants are thin, protective coatings that are placed on the back teeth, or molars, to help prevent cavities. Your dentist may recommend a sealant for your children as soon as they get their first molars, at around age six, and again when they get their second set of molars around age 12. Sealants are easy to apply and completely painless.

Root canal

You might need a root canal if tooth decay reaches all the way inside the tooth to the nerve. During a root canal, the nerve is removed and replaced with a filling made of a biocompatible material, usually a combination of a rubber-like material called gutta-percha and adhesive cement.

Probiotics

Probiotics are mostly known for their role in digestive health, but new research has shown that healthy bacteria may be beneficial for your teeth and gums.

Probiotics have been shown to prevent plaque and treat bad breath. They also help to prevent oral cancers and decrease inflammation from gum disease.

While large clinical trials are still needed to prove their effectiveness, results to date have been promising. You can take a probiotic supplement or eat foods high in beneficial bacteria, such as yogurt, kefir, and kimchi. Other popular probiotic foods include sauerkraut, tempeh, and miso.

Changing daily habits

Keeping your mouth healthy is a daily commitment. A dental hygienist can teach you how to properly take care of your teeth and gums on a daily basis. In addition to brushing and flossing, your daily routine can include mouthwash, oral rinses, and possibly other tools, such as a Waterpik water flosser.

Shop for a water flosser.

Surgery for dental and oral problems

Oral surgeries are usually performed to treat more serious cases of periodontal disease. Certain dental surgeries can also be done to replace or fix missing or broken teeth caused by an accident.

Flap surgery

During flap surgery, a surgeon makes a small cut in the gum to lift up a section of the tissue. They then remove tartar and bacteria from underneath the gums. The flap is then stitched back into place around your teeth.

Bone grafting

Bone grafting is needed when gum disease causes damage to the bone surrounding the root of your tooth. The dentist replaces the damaged bone with a graft, which can be made from your own bone, a synthetic bone, or a donated bone.

Soft tissue grafts

A soft tissue graft is used to treat receding gums. A dentist will remove a small piece of tissue from your mouth or use a donor tissue and attach it to the areas of your gums that are missing.

Tooth extraction

If your dentist can’t save your tooth with a root canal or other surgery, the tooth will likely need to be extracted.

You may also need a tooth extraction if your wisdom teeth, or third molars, are impacted. Sometimes, a person’s jaw isn’t large enough to accommodate the third set of molars. One or more of the wisdom teeth will become trapped or impacted when it tries to emerge. A dentist will typically recommend that wisdom teeth be extracted if they cause pain, inflammation, or other problems.

Dental implants

Dental implants are used to replace missing teeth that are lost due to a disease or an accident. An implant is surgically placed into the jawbone. After the implant is placed, your bones will grow around it. This is called osseointegration.

Once this process is complete, your dentist will customize a new artificial tooth for you that matches your other teeth. This artificial tooth is known as a crown. The new crown is then attached to the implant. If you’re replacing more than one tooth, your dentist may customize a bridge to fit into your mouth. A dental bridge is made of two abutment crowns on either side of the gap, which then holds the artificial teeth in between in place.

What can go wrong?

Periodontal disease can eventually break down the bone that supports your teeth. This can lead to many complications. You’ll likely need dental treatment to save your teeth.

Risks and complications of untreated periodontal disease include:

  • tooth abscesses
  • other infections
  • migration of your teeth
  • pregnancy complications
  • exposure of the roots of your teeth
  • oral cancer
  • tooth loss
  • increased risk of diabetes, heart disease, cancer, and respiratory diseases

If left untreated, an infection from a tooth abscess can spread to other parts of your head or neck. It can even lead to sepsis, a life-threatening blood infection.

oral health


Keeping your teeth and gums healthy

Good oral health boils down to good general health and common sense. The best ways to prevent oral health problems are to:

  • brush your teeth with a fluoride toothpaste at least twice a day
  • floss at least once a day (one of the most beneficial things you can do to prevent disease in your oral cavity)
  • have your teeth cleaned by a dental professional every six months
  • avoid tobacco products
  • follow a high-fiber, low-fat, low-sugar diet that includes plenty of fruits and vegetables
  • limit sugary snacks and drinks

Foods with hidden sugars include:

  • condiments such as ketchup and barbecue sauce
  • sliced fruit or applesauce in cans or jars that have added sugars
  • flavored yogurt
  • pasta sauce
  • sweetened iced tea
  • soda
  • sports drinks
  • juice or juice blends
  • granola and cereal bars
  • muffins

Get more tips on preventing oral health problems. Good oral health is especially important to groups such as children, pregnant women, and older adults.

What you should know about your child’s oral health

The American Academy of Pediatrics (AAP) recommends that children start seeing a dentist by their first birthday.

Children are highly susceptible to dental cavities and tooth decay, especially those who bottle feed. Cavities may be caused by too much sugar left on the teeth after bottle feeding.

To avoid baby bottle tooth decay, you should do the following:

  • only bottle feed during meal times
  • wean your child off of a bottle by the time they’re one year old
  • fill the bottle with water if you must give them a bottle at bedtime
  • begin brushing with a soft baby toothbrush once their baby teeth start to come in; you should use only water until your child learns not to swallow the toothpaste
  • start seeing a pediatric dentist regularly for your child
  • ask your child’s dentist about dental sealants

Baby bottle tooth decay is also known as early childhood caries (ECC). Go here to find out more ways you can prevent ECC.

What men need to know about oral health

According to the American Academy of Periodontology, men are less likely to take good care of their teeth and gums than women. Compared to women, men are less likely to brush twice per day, floss regularly, and seek preventive dental care.

Oral and throat cancer is more common in men. A 2008 study showed that men with a history of periodontal disease are 14 percent more likely to develop other types of cancer than men with healthy gums. It’s important that men recognize the consequences of poor oral health and take action early in life.

What women need to know about oral health

Due to changing hormones at various stages of their lives, women are at risk for several oral health issues.

When a woman first starts menstruating, she may experience mouth sores or swollen gums during her periods.

During pregnancy, increased hormones can affect the amount of saliva produced by the mouth. Frequent vomiting caused by morning sickness can result in tooth decay. You can receive dental care during pregnancy, but you should let your dentist know if you’re pregnant.

During menopause, lower amounts of estrogen can increase your risk of gum disease. Some women may also experience a condition called burning mouth syndrome (BMS) during menopause. Learn about the different dental issues that women face throughout their lives.

What people with diabetes need to know about oral health

Diabetes affects the body’s ability to fight off bacteria. This means that people with diabetes have a higher risk of having oral infections, gum disease, and periodontitis. They’re at an increased risk of an oral fungal infection called thrush.

For people with diabetes to take charge of their oral health, they’ll need to maintain control over their blood sugar levels. This is on top of brushing, flossing, and dentist’s visits. Explore the link between type 2 diabetes and oral health.

The bottom line about dental and oral health

Your oral health has an effect on more than just your teeth. Poor oral and dental health can contribute to issues with your self-esteem, speech, or nutrition. They can also affect your comfort and overall quality of life. Many dental and oral problems develop without any symptoms. Seeing a dentist regularly for a check-up and an exam is the best way to catch a problem before it gets worse.

Ultimately, your long-term outcome depends on your own efforts. You can’t always prevent every cavity, but you can reduce your risk of severe gum disease and tooth loss by staying on top of your daily oral care.

Fun Dental Facts-II

Fun Dental Facts in Hanover | Inspired Dental Care

Fun Dental facts with real statistics. The average person only brushes for 45-60 seconds a day. The recommended amount of time is at least 2 minutes.

Fun Dental Facts :

  • Americans buy more than 14 million gallons of toothpaste every year.
  • Coconuts are natural anti-bacterial food and can help reduce the risk of developing gum disease and cavities.
  • 25% of adults DO NOT brush twice a day. This increases the risk of developing tooth decay by 33%.
  • Roughly 75% of school children worldwide have active dental cavities.
  • 48% of young adults have untagged themselves from a photo on Facebook because of their smiles.
  • 90% of a bad breath smell originates in the mouth.
  • People who smoke are 2-7 times more likely to develop periodontal disease than non-smokers.
  • It was customary during the middle ages to kiss a donkey if you had a toothache.
  • Tooth enamel is the hardest structure in the human body.
  • Roughly 25% of American adults have no teeth.
  • The average human being produces 100,000 gallons of saliva during their lifetime.
  • Tooth decay is the second most common disease, second only to the common cold.
  • People prefer blue toothbrushes to red ones.
  • Teeth start to form before we are born.
  • Almost 65 million American adults have some form of periodontal disease. Of this number 38.4% are women, 56.4% are men.
  • Expectant mothers with poor oral hygiene are 7X more likely to deliver premature and low birth weight babies.
  • People with periodontal disease are 2X more likely to develop heart disease.
  • People who drink 3 or more cans of pop daily have 62% more tooth decay, fillings, and tooth loss than people that don’t drink pop.
  • The first toothbrush with bristles was made in China in 1498. Bristles from hogs, horses, and badgers were used.
  • Replacing a toothbrush after illnesses help prevent the potential for re-infection.
  • It takes 43 muscles to frown. It only takes 17 to smile.
  • 61% of adults are attracted to somebody by their smile alone.
  • An apple a day may keep the doctor away, but it also makes you 3X more likely to develop dental decay.
  • Kids miss 51 million school hours a year due to dental-related illnesses.
  • By drinking one can of soda daily, the average American gains 15 lbs each year.
  • The human tongue is as unique as a fingerprint. No two people have the same tongue print.
  • There are more bacteria in the human mouth than there are people on Earth.
  • The average woman smiles 62 times a day. The average man? Only 8 times.
  • Kids laugh roughly 400 times a day. The average adult laughs only 15 times per day.
  • Dinosaurs grew new teeth when one was lost or broken.
  • A fossilized T-Rex tooth can weigh up to a pound.
  • In 200 A.D., the Romans used a mixture of bones, eggshells, oyster shells, and honey to clean their teeth.
  • A snail’s mouth is no larger than the head of a pin, yet it can contain over 25,000 teeth.
  • A single can of soda contains 10-12 teaspoons of sugar. The recommended daily dietary intake of sugar is 4 teaspoons.
  • In 1994, a West Virginia prison inmate braided dental floss into a rope scaled the wall, and escaped!
  • According to a recent survey by Time magazine, 59% of people would rather have a dental appointment than sitting next to someone who is talking on a cell phone.
  • In the 1800s, blacksmiths and barbers also served as dentists.
  • Toothpicks are the object most often choked on by Americans.
  • The stone-faced farmer in artist Grant Wood’s famous “American Gothic” painting was actually the artist’s dentist.
  • Sports-related injuries account for approximately 5 million missing teeth per year.
  • Americans spend only $2 billion a year on dental care products.
  • Contrary to popular belief, George Washington’s famous dentures were not made from wood. His four pairs of custom choppers were crafted from gold, ivory, lead, and a mixture of human, donkey, and hippopotamus teeth.
  • The cotton candy making machine that made widely consumed cotton candy possible was co-invented by a dentist. Before it was cotton candy, the fluffy confection was called “fairy floss.”
  • The earliest known dentist was Hesi-ren, an Egyptian “doctor of the tooth” who lived around 3000 B.C.
  • The saying “cat got your tongue” originated 2500 years ago in ancient Assyria where conquered soldiers and criminals had their tongues cut out and fed to the king’s cats.
  • Cavities in teeth have been filled since the earliest of times with a variety of different materials, including gum, stone chips, and even turpentine resin.
  • The lifespan of a taste bud is about 10 days. The five known tastes detected by taste buds are: bitter, sour, salty, sweet, and umami. Umami was identified in 1908 by Japanese research and the chemical responsible for it is monosodium glutamate.
  • 60% of people don’t know that a sore jaw when combined with chest pain, can signal a heart attack – especially in women.
  • The average toothbrush contains about 2500 bristles grouped into about 40 tufts per toothbrush. The tufts are folded over a metal staple and forced into pre-cored holes in the head and fused into the head with heat. The handle is made of at least two materials, usually plastic and rubber. The grips used for the handle are precision, power, spoon, oblique, and distal oblique.
  • 90% of system diseases have oral manifestations.
  • The most valuable tooth belonged to Sir Isaac Newton. In 1816, one of his teeth was sold in London for $3,633.00, or in today’s terms, $35,700.00. The tooth was set in a ring.
  • Sugar Facts: Chemical manufacturers use sugar to grow penicillin. A teaspoon of sugar after a hot curry will extinguish the furnace in your mouth. A spoonful of sugar added to a vase will prolong the life of freshly cut flowers.
  • In the 1800s, people who had false teeth in England ate in their bedrooms before gatherings and events at the dinner table. This unique Victorian tradition protected them against the embarrassment of having their teeth ‘fall off’ while dining.
  • Dolphins use their teeth to grab only, not to chew, as dolphins’ jaws have no muscles.
  • Mosquitoes have 47 teeth.
  • In 1905, dental assistant Irene Newman was trained to clean teeth. She became the first dental hygienist.
  • Not too long ago, dentures were common wedding gifts in the British Isles. At that time, many people expected to lose all their teeth and had their teeth extracted at an early age.
  • In colonial days, debtors were shipped from Europe to America to work as servants. Instead of signing a contract, they sealed their agreement by leaving their dental imprint in wax.

 How to reduce the risk of cavities –

  • Brush your teeth twice a day for two minutes to remove sugars and food particles from your teeth.
  • Limit between-meal snacking.
  • Keep added sugar in your diet to a minimum by making wise food and beverage choices.
  • Include dairy, plenty of fruits and vegetables, and water in your diet—they all play a role in your dental health.


Image result for images of facts about teeth


Image result for images of dental facts


Image result for images of dental facts


Fun Dental Facts-I

fun teeth facts

The following are enjoyable fun dental facts that you have come across for the first time.

Fun Dental facts –

1. Your teeth are hard on the outside and soft on the inside. The hard, white part that you can see is called ‘enamel.’ Your enamel means that you can chew food without hurting the soft part underneath.

2. Teeth are the hardest part of your body, even harder than bones!

3. Although teeth and bones look the same color and are hard, teeth aren’t bones.

4. Rats’ teeth are constantly growing, causing them to feel a permanent itch. That is why they are constantly nibbling and gnawing on everything they can get their paws on! Once your baby teeth fall out, you will grow your adult teeth, which last forever.

5. Sweets and candy make a bad acid in your mouth which hurts teeth. Make sure you brush for two minutes every time you do your teeth to keep them nice and healthy.

6. Your mouth will make enough saliva in your lifetime to fill two swimming pools!

7. You use four different types of teeth in your mouth to eat: incisors, canine, premolars, and molars.

8. A t-rex dinosaur had 60 teeth, but you only have about 20!

9. Nobody else in the whole world has the same shapes of teeth as you — your smile is special.

We smile, we talk, we eat… but how? It is our teeth that help us do all these things and almost every one of us have a habit of taking our ivories for granted. Perhaps our teeth are the most ignored ones in our entire body. It is about time that we start taking care of our teeth before it is too late! We really cannot push you about oral hygiene because that’s a matter of personal choice but we can definitely give you a list of 30 interesting human teeth facts that you will perhaps enjoy reading.

Just a heads up, these 30 facts are going to cover some serious and some fun facts. If you expect only serious stuff, you may find this a little disappointing.

Image result for images of facts about teeth

Interesting Human teeth facts

1. Humans get only two sets of teeth throughout their lifetime. The first set is the baby teeth with only 20 teeth in the set. The second teeth are dubbed as the adult teeth with 32 teeth in the set.

2. Teeth start forming way before birth. To be more specific, the foundation of teeth is laid during the fetal stage.

3. Despite the fact that teeth start forming long before birth, they don’t really show up until the baby is born and attains the age of about 6 months.

4. The tooth enamel is the hardest known substance in the entire human body.

5. The plaque formed on our teeth is known to have more than 300 different species of bacteria. Unfortunately, they aren’t healthy ones.

6. On average, a person spends around 38 days in his/her entire lifetime for brushing teeth.

7. Only one-third of the teeth can be seen. The remaining two-third is hidden inside the gums.

8. Several diseases have a connection to oral health such as diabetes, osteoporosis, and heart disease.

9. Just like fingerprints, teeth are also unique to every human being. No two humans will have identical teeth.

10. There are different types of teeth and each type has a specific function. For example, incisors are meant for biting off pieces from food, canines are meant for holding and tearing apart the food while molars are meant for grinding the food.

11. Just brushing teeth is not enough. Brushing takes care of 40% of oral hygiene. Remaining 60% is taken care of by flossing.

12. The first-ever toothpaste to be ever made was by the Egyptians some 5000 years ago. It was just a mixture of pumice and wine.

13. Mountain Dew Teeth or the Appalachian Teeth is the name given to the rotten brown teeth of people in the Appalachian region of the USA. Mountain Dew is their official drink which even replaces water most of the time. It is this constant sipping of this beverage that has caused this dental crisis.

14. Chinese researchers are trying to grow teeth synthetically. They collected stem cells from human urine (not a good place to hunt for stem cells) and used the same to grow human teeth in the mouth of a mouse. Beginnings of enamel and dental pulp were recorded but there is still a long way to go.

15. Studies show that keeping toothbrushes 6 feet away from the toilets does not really help in keeping toothbrushes free of germs. Toothbrushes get smothered with bacteria every day in our mouth and the best way to keep our toothbrushes free of germs is to keep them dry because bacteria thrive well in moist conditions.

16. Using a bristles cap for your toothbrush isn’t going to help either because those caps prevent the bristles from becoming dry. The best thing to do here is to dry out the bristles properly before using a cap.

17. Men in ancient Mayan civilization had small holes made on their teeth and fitted those holes with gemstones. They believed that doing so helped to make their mouths pretty.

18. Ancient cultures often used twigs for brushing their teeth. The use of twigs as toothbrushes still continues in many countries such as India. These twigs are often obtained from trees like neem and cinnamon that have antibacterial properties. Studies show that these twigs are equally effective as modern toothbrushes.

19. The Chinese were the first people to have invented an object closer to a modern-day toothbrush. The handle was made using bamboo and the bristles were made using boar hair.

20. Brushing teeth right after eating is not suggested. Right after eating, the saliva in the mouth contains high concentrations of acid. Brushing actually leads to abrasions and brushing right after eating will means acids along with abrasions lead to faster wearing of teeth enamel.
Interesting Human Teeth Facts: 21-30

21. Norway has the world’s largest tooth bank which stores milk teeth from babies. The bank has 17,000 teeth stored. According to Norwegian Mother and Child Cohort Study (MoBa) researchers, studying the milk teeth along with urine and blood samples from parents help them to find out how environmental pollution impact the health of both child and mother because the researchers believe that the milk teeth are good indicators of environmental pollution.

22. In Asian countries like Malaysia, Indonesia, and Thailand, fake tooth braces are actually styled statements, and youth consider these braces to be cool as opposed to being ugly, geeky, and uncomfortable. These braces sell at a price range of $100 to $1200.

23. A 17-year old boy named Ashik Gavai from India was suffering from composite odontoma which led to the formation of a tumor in his lower jaw. The tumor was operated and doctors removed 232 teeth from his mouth. In addition, the doctors also found a brick-like marble structure that they had to break apart using chisel and hammer to remove it completely.

24. The saliva in the mouth is responsible for protecting teeth from bacteria.

25. Cavities or dental caries (usually referred to as tooth decay) is one of the most common diseases found in the world.

26. Lucy Beaman Hobbs was the world’s first licensed female dentist. She received her license in 1866.

27. The world’s first known dentist lived 5000 years ago. He was an Egyptian by the name Hesi-Re.

28. The scientific term used to describe toothache is Odontalgia.

29. Right-handed people will usually chew their food on the right side of their mouth and left-handed people chew food on the left side of their mouth.

30. The most preferred and commonly used toothbrush color is blue.


Home Exercise for All-II

Image result for images of types of home exercise

Home Exercise

As the saying goes, variety is the spice of life, which also goes for your weekly exercise routine. The importance of different types of exercise extends beyond just alleviating the boredom of routine, but also helps you develop a well-rounded physical experience, keeping your body on its proverbial toes.

Focusing solely on one form of exercise may see you excel quickly in that area, but you may also be neglecting the other physical needs, leading to an imbalance in the body and, more importantly, an increase in certain health risks.

Think of your body as a finely tuned machine, and just like machines they need to be maintained in a variety of ways. Take a car, for instance, it’s not just the engine that has to be in tip-top condition before you head out for a long drive, every bit of the car — oil, breaks, suspension, tires, etc. — needs to be functioning correctly so you can enjoy a safe and smooth journey.

Related image

Click here for Background of Home Exercise -

Exercise and physical activity fall into four basic categories—endurance, strength, balance, and flexibility. Most people tend to focus on one activity or type of exercise and think they’re doing enough. Each type is different, though. Doing them all will give you more benefits. Mixing it up also helps to reduce boredom and cut your risk of injury.

Some activities fit into more than one category. For example, many endurance activities also build strength. Strength exercises can also help improve balance.

Endurance

Endurance or aerobic, activities increase your breathing and heart rate. They keep your heart, lungs, and circulatory system healthy and improve your overall fitness. Building your endurance makes it easier to carry out many of your everyday activities. Endurance exercises include:

  • Brisk walking or jogging
  • Yard work (mowing, raking, digging)
  • Dancing

Strength

Strength exercises make your muscles stronger. They may help you stay independent and carry out everyday activities, such as climbing stairs and carrying groceries. These exercises also are called “strength training” or “resistance training.” Strength exercises include:

  • Lifting weights
  • Using a resistance band
  • Using your own body weight

Balance

Balance exercises help prevent falls, a common problem in older adults. Many lower-body strength exercises will also improve your balance. Balance exercises include:

  • Standing on one foot
  • Heel-to-toe walk
  • Tai Chi

Flexibility

Flexibility exercises stretch your muscles and can help your body stay limber. Being flexible gives you more freedom of movement for other exercises as well as for your everyday activities, including driving and getting dressed. Flexibility exercises include:

  • Shoulder and upper arm stretch
  • Calf stretch
  • Yoga

Fitness training should encompass five different elements, according to experts. You can accomplish each of these five elements — aerobic exercise, strength training, stretching, core strengthening, and balance training — without going to the gym or purchasing exercise equipment. You do not need to perform each type of exercise every day. For example, if you concentrate on aerobic exercise, core strengthening, and stretching one day, you can do strength and balance exercises the following day.

Aerobic

Aerobic exercise, or cardio, benefits your heart and lungs. These types of exercises require you to use large muscle groups at an intensity that causes your heart rate to increase. At home, you can dance to your favorite music, march or jog in place, do jumping jacks or walk up and down your stairs. If you do it at a vigorous pace, vacuuming and other housekeeping chores can count as your cardio exercise. Try to incorporate at least two and a half hours of moderate aerobic activity into your schedule each week.

Strength Training

Strength training builds the strength of your muscles and bones. At home, you can use your own bodyweight to increase your muscular strength. Examples of good strength training exercises include pushups (either with straight or bent knees), chair dips, lunges, side-lying leg lifts and calf raises. Aim for at least two strength-training sessions per week.

Stretching

By improving the range of motion in your joints, stretching can improve your flexibility and your posture. You can stretch your hamstrings by lying on the floor and bringing one leg toward your head. For your calves, stand on a step and let both of your heels drop down toward the floor. Because you should be warmed up before stretching, it’s a good idea to complete the stretches after finishing your workouts.

Core Exercises

Core exercises strengthen the abdominal, lower back, and pelvic muscles. These exercises are important because they help protect your back from injury and make all of your movements more efficient. Crunches, planks, and side planks are core exercises that require no equipment.

Balance Training

Balance problems can lead to falls and injuries, especially as you get older. You can improve your balance by standing on one leg. If you can easily do that, try balancing while washing the dishes or brushing your teeth.

Flexibility

Flexibility is really important and much overlooked when people think about exercise. Staying flexible improves your quality of life, imagine not being able to look over your shoulder to reverse your car. If you sit for long periods of time each day you’ll notice that your flexibility decreases. Stretches (see the Physiotherapy postcards on easy stretches and exercises to do if you sit all day), yoga, tai chi, pilates, and lots of other exercise classes will all help improve flexibility. Flexibility training can also improve balance, which is good news for all of us as we get older.

Exercise can be done at different levels of intensity, that is how hard you work.

 Moderate Intensity Exercise        

We refer to moderate exercise as any activity that increases your breathing rate slightly and makes you a bit warmer and your heartbeat slightly faster. You don’t have to be out of breath, you should still be able to have a conversation, but you should be aware of breathing a bit faster or harder than normal.

There are many kinds of activities that fit this description, walking at a steady pace, cycling, dancing, swimming (ok, in your average swimming pool you might not feel warmer, but you know what we mean), and lots of exercise classes and routines.

Vigorous Exercise

Vigorous or high-intensity exercise is the kind that gets you sweaty and out of breath, for example, running or playing sport. If you are doing moderate or high-intensity exercise it’s worth warming up and cooling down properly. This can include a slower walk or some stretches.

It is easy to be put off by the thought that the only kind of exercise that is good for you is the vigorous kind, but this is not true – moderate-intensity exercise and low impact exercise (yoga, etc) are all good for you too.

Related image

Image result for images of types of dancing workout


Click here for Dancing as Workout -

Want to look slim and elegant? Are exercise and dieting not your cup of tea? Looking for an easy and effective process that cuts down those extra pounds? If yes, then you must definitely try your hand at dancing.

Dance is an art form passed down by our ancestors that has evolved with time. Primarily used to tell stories, express emotions or as an act of religious ritual, dance has now moved on to elaborate moves in tandem with complex rhythm and beats, a social pass time, a form of entertainment, and even as an exercise routine.

According to a survey published by The American Council of Exercise, health experts and fitness specialists unanimously agree that dance has evolved into a form of exercise for weight loss and physical fitness and they also approve of dance-based exercise routines as a growing trend. An hour of dancing is said to burn 400 calories, which is the same as swimming or riding a bicycle, in addition to a host of other benefits such as improved cholesterol levels, slower heart rate, and lower blood pressure.

Regular dancing can slow down your heart rate, lower blood pressure, improve cholesterol levels, and burn fat, all signs of effective and healthy weight loss. Read further to know why you should dance to lose weight.

Different Dance Forms to Lose Weight

Dance workouts are becoming increasingly popular these days. There are many forms of dance that can help in reducing weight. It is a fantastic form of exercise and is effective in burning calories. Regular exercise might become boring and monotonous and hence dancing appears as a pleasing and fun option. However, you have to choose the right type of dance depending upon your body structure, strength, and stamina. Some dance forms are more strenuous than others and you have to be careful in choosing the right one to get maximum results.

Get ready to hit the dance floor! Dancing is a whole-body workout that’s actually fun.

It’s good for your heart, it makes you stronger, and it can help with balance and coordination.

A 30-minute dance burns between 130 and 250 calories, about the same as jogging.

The focus might be on the footwork, but the series of leaps, turns, shimmies, and cha-chas engage the entire body.

There are lots of options. With dance-inspired workouts ranging from ballroom and ballet to hip hop and club dance, you’ll never be bored!

Intensity Level: Medium

The intensity depends on the type of dance you choose. Fast-moving dance styles like hip hop and salsa are more intense than slower dances like the tango or waltz. All of them will use your whole body and will challenge your brain as you learn the choreography and form.

Areas It Targets

Core: Yes. Depending on the type of dance you choose, some of the steps/moves will engage the core muscles.

Arms: Yes. Although most dances focus on your lower body, you’re also using your arms.

Legs: Yes. The choreography will have you doing moves that work your lower body, including your quads and hamstrings.

Glutes: Yes. Hip hop dancing and ballet include moves that engage the glutes.

Back: Yes. Dance uses your core muscles, including those in your back.

Type

Flexibility: Yes. Most dance-inspired workouts include moves that improve flexibility.

Aerobic: Yes. Dancing raises your heart rate. The more up-tempo the dance style, the better it is for your heart.

Strength: Yes. You won’t be lifting weights, but your body weight counts, helping to build muscle strength.

Sport: No. You can enter dance competitions, but dance can be purely social or artistic.

Low-Impact: Yes. Dancing can be a high-or low-impact workout depending on the style of dancing.

What Else Should I Know?

Cost: Free if you already know-how, or the cost of classes if you want lessons at a studio.

Good for beginners? Yes. There are dance classes aimed at beginners. If you’re just starting out, give yourself time to learn the moves. It doesn’t happen overnight, but it will happen eventually!

At home: Yes. You can dance anywhere.

Equipment required? It depends. You will require specific shoes; for others (like hip hop) all you need are sneakers.

Depending on the style, you can improve your heart health, joint mobility, strength, balance/coordination, and an overall sense of well-being, making dance good for most everyone. Try a dance workout DVD or follow an online video at home.

If you have a medical condition such as diabetes or high blood pressure, take note of how you feel before, during, and after dancing. If you’re not feeling right or it takes more than a few minutes to get back to “normal,” check with your doctor before continuing.

Is It Good for Me If I Have a Health Condition?

Dancing is a fantastic activity if you have medical conditions such as heart disease, high cholesterol, or diabetes.

Dancing more intensely, for a longer time, is more of a workout for your heart. You can choose the dance style and intensity level that meets your needs. Your doctor can let you know what’s OK.

If you have an injury, let it heal before you start dancing. If you have other physical limitations, you may have more options than you think. Integrated, or inclusive dance, introduced in the 1960s, is for people with physical and mental limitations. There are dance companies that include dancers in wheelchairs, for instance.

Dancing is a great way to keep fit during pregnancy, especially if you were a dancer before getting pregnant. Be careful with your balance during the second and third trimester, when pregnancy can add stress to your back. Ask your doctor about doing pelvic floor exercises like Kegels and core activities to improve your abs, low back, and hip strength as a complement to your dance training.

Freestyle  –

This dance form enables you to move freely without bothering about the dance steps or body movements. This is the easiest of all dance forms and can be practiced by all age groups.  Apart from causing weight loss, it also makes your body more flexible. This dance form can be performed on any type of loud music and you can increase your pace by dancing any way you like. The beats should be fast to boost up your energy levels and teases you to dance non-stop. This dance should be practiced every day for 30 minutes to lose weight. You can dance alone or with a group that loves thumping, fast-paced music. It will be a fantastic experience to enjoy this dance form in a group.

Hip Hop –

Hip hop is an urban, street form of dance that is most popular in nightclubs. The quick succession of movements involved in this dance exercises the entire body. It is a high energy workout that is good for both beginners and veterans. It has been given this name because of the fact that it takes place in the hips and waist and thus helps to firm and tone your abs. Dancing while watching a video for an hour will enable you to burn around 250 calories.

Hip Hop Abs –

This dance form strictly uses dance moves to shape and tone your abs so there is no need to lie on the floor and do crunches. This involves isolation exercises in combination with an intense cardio workout to enable you to lose fat and build a strong six-pack. Women have a greater advantage to cut down those extra pounds in abs and look pretty. Hip hop abs should be completed in 2 to 3 days a week.

Belly Dancing –

This is an exotic art form that helps tone problem areas like hips, back, and abs. This form involves slow and controlled isometric movements that help to maintain flexibility and improve circulation.  Shaking the belly or lower body burns calories and helps shape up your buttocks. In addition, it also burns thigh and abdominal fat. By strengthening muscles and improving posture, prevents back pain that is often an obstacle to exercising. Because it is a low impact dance form, it is less stressful to the bones of the feet than other exercises and thus improves bone density. An hour of belly dancing can burn up to 300 calories. Though it is not an aerobic exercise it can form part of a training regimen. This can be practiced by watching videos at home. Belly dancing increases the flexibility and fitness of your body.

Salsa –     

This intricate and exhilarating Latin American dance form has recently gained immense popularity in night clubs and dance studios. It has drawn inspiration from the dance styles of cumbia, bomba, and merengue music among others. Salsa basically consists of a pattern of six steps danced over eight counts of music along with several turns and is danced side to side. An hour of salsa dance steps causes you to burn an impressive 420 calories. Hence, it is a good choice for a weight loss program.

Zumba –

Zumba incorporates salsa, rumba, merengue and hip hop moves to cause movement thus giving you a cardio workout. Zumba classes are offered by many chain gyms across the country and aim to make people enjoy while working out simultaneously. No partner is needed for this type of dance. Most of the steps are easy and isolate your arms, abs, and legs for strengthening. This aerobic workout is great for overall fitness. You are bound to enjoy the results as you enjoy the dance. This is one of the most demanding dance styles all over the world for its convenience in style and output. For best results, Zumba workout should be done at least 2 to 3 days a week.

Jazzercise –

Founded in 1969, it is one of the oldest dance forms, which basically combines jazz dance and strength training to tone muscles and burn calories simultaneously. It builds muscles during the workout through the use of barbells and dumbbells. Apart from these, it involves some classic Pilates and yoga movements that lengthen muscles while cardio boxing moves give an aerobic workout. According to the Jazzercise website, this workout enables you to burn up to 600 calories in an hour. It should be done 2 to 3 times a week to lose weight effectively.

Ballet-

Ballet is often viewed as a slow-moving and low impact dance form but it plays a great role in shaping your body. In fact, this dance forms demands a lot of flexibility and it actually requires strength and precision to perform most ballet positions and movements. The slow pace and posture required in ballet are very much similar to Pilates. The slow and controlled movements help to build long and lean muscles. Some ballet movements are comparable to certain gym exercises. The movements cause the stretching and lengthening of the muscles, thus providing you a full-body workout. Concentration will increase the flexibility of your body parts and help burn fat deposits that make you look fat.

Pole Dancing –

This dance form might not appear effective to most of us. But you will be surprised to know that climbing and rotating on a pole increases your flexibility and also helps you burn down some calories. A pole dance of 30 minutes is equivalent to 20 minutes in a gym. You can try pole dancing to lose weight, tone your muscles, and shape your body.

African Dance  –

It is a fun dance form that generally involves a combination of contemporary and traditional African dance forms and is extremely aerobic. It introduces some great music and culture and is suitable for beginners as well as experienced dancers.

How dance results in weight loss –

1. Lose Weight At A Dance Studio

It is a common misconception that dance classes are for kids but if you switch on your television and surf through the channels you are bound to come across dance reality shows featuring adults, some of them even mothers and fathers to teenagers. It is obvious that you are going to find dance studios in your city geared towards adults considering these fabulous dancers on television are learning their moves somewhere. Take up dance lessons and lose some weight as dance like aerobics utilizes all parts of the body to give you a complete workout. Simple jazz or hip hop routine could effectively burn around 300 calories and simultaneously work out all your muscle groups. The best thing about taking up dance classes is that you don’t need to be able to dance, in fact, you are paying an expert to effectively teach you.

2. Ideal Dance Routines For Weight Loss

Unfortunately, Indian classical dance has little to offer in terms of weight loss, focused mainly on hand and leg movements and facial expressions, you are bound to be disappointed if you are looking for weight loss. Effective dance routines for weight loss are mainly ballroom dance like Tango, Jazz, Cha-cha, and Pasa Doble or street dance forms like salsa and hip hop. These high energy dance routines can be compared to an intense workout at the gym and often yield the same results. Ballroom dance being a weight-bearing activity effectively burns calories, improves bone density, and works all muscles in the body.

3. Dance For Weight Loss At Home

For many of us, the idea of dancing in a group would be embarrassing simply because we haven’t done it before. So if you are pathologically shy and blush red at the idea of dancing in groups, there’s no need to give up on dance to lose weight. Simply lock yourself into your room, put on your favorite dance tracks, and move to the beats.

Dance Vs Other Weight Loss Methods

Common weight loss solutions are working out at the gym, weight-loss diets, weight loss supplements, and pills. Dance effectively beats all these other weight loss methods. For those of us who are easily bored or not athletically inclined, working out at the gym can be a time consuming and hard task. In comparison to working out at the gym, dance can be fun even as you listen to upbeat music and move your body.

Weight loss diets, in most cases, unfortunately, mean starving your body and can result in weakness, headaches, and the constant feeling of hunger whereas with dance you simply burn off the calories you consume. Weight loss supplements and pills come with their share of adverse side effects  whereas with dance the only side effects are the positivity it infuses into your daily life.

One important thing that you have to keep in mind is the clothes you wear while dancing. Opt for loose shirts and trousers which make you feel comfortable. Consulting your family doctor before starting any work out will be of great help for your health. So those willing to sweat it out better wear your dancing shoes!

Exercise may be difficult to maintain for some people. Consider the following tips to achieve long-term success:

  • Have a clear goal: Whether for health reasons or otherwise, try to always keep in mind the reason you started increasing your exercise levels.
  • Work at your own pace: Doing too much too quickly can increase the risk of injury and the chance to develop a stable routine. Set targets based on the goals you established at the start of the regimen and celebrate small wins to boost confidence.
  • Enjoy yourself: A regimen is more sustainable if a person enjoys the physical activities that it involves.
  • Join a club with a friend: If you join a fitness club with a friend, or exercise with a friend, you may enjoy the sessions more. Some people prefer not to have the stress of someone else around. This depends on you.
  • Trainers and teachers can be helpful: People just starting a regimen or looking to step up their routine may benefit from a personal trainer or teacher. They can provide motivation and guidance, helping people track their goals and stay dedicated.
  • Vary your exercises: Change your exercise program every few weeks. Mixing it up can help a person work on different muscle groups and increase the range of benefits. If you enjoy one particular exercise, such as running, try changing the speed and distance of a run, or follow a different route with more hills.
  • Make it a habit: After a few weeks of regularity, an exercise routine starts to become a habit, even if you find it difficult or boring at first.

The benefits of regular physical activity are wide-reaching and should form a part of every person’s day to help them remain healthy.

Image result for images of types of rope exercise

Click here for Rope Exercise -

Chances are, jump ropes have been in your life since the PB&J-and-juice-box days of your childhood. So it’s time to add a new, badass kind of rope to your fitness routine: battle ropes. You’ll usually find them anchored to a wall or sturdy beam or pole, and while they may vary in length (they can be up to 100-feet long), weight, and thickness, all battle ropes serve the same purpose: Providing a killer workout.

As the name implies, these supersized ropes are heavy, which adds resistance (i.e. a major challenge) to work your muscles like never before. The benefits: You strengthen your abs, arms, and shoulders, engage your legs, and get a killer conditioning workout all in one go. Better yet, waving, slamming, and whipping these hefty ropes doesn’t strain your body the way high-impact activities do—but you still reap serious fitness benefits. In fact, research suggests using battle ropes for just 10 minutes can be considered a vigorous workout Trusted Source. Plus, high-intensity interval training with battle ropes may improve both aerobic and anaerobic capacity after just four weeks. In other words, you’ll be owning both strength and endurance workouts. To top it off, battle rope training torches about 10 calories per minute—more than both burpees and squats!

They work for every muscle group simultaneously and allow freedom of movement. They can also be catered to your fitness level—whether you’re a beginner or a pro athlete.

How to start skipping –

  • Adjust the length of your rope.
  • Hold the handles at each end of the rope, by your sides, with one handle in each hand.
  • Step in the middle of the rope, keeping the length taut with the ends stretched upwards. Shorten the rope until both the ends reach your armpits.
  • Step in front of the rope and swing the rope from behind to the front.
  • As the rope reaches your feet, jump! Keep your legs straight.
  • Land softly on the floor.

Ready to slam your way into top shape? Add these kick-butt battle rope exercise to your fitness routine!

1. Double Wave – Wave your way to a fitter form and master the basics of the battle ropes with this exercise. To start, stand facing the anchor with feet shoulder-width apart. Grasp one end of the rope in each hand so that your palms face each other. Bend knees slightly, brace your core, and move both arms up and down rapidly, creating waves in the rope.

2. Alternating Wave – Talk about makin’ waves! Stand facing the anchor point with feet shoulder-width apart and knees slightly bent. Grab one end of the rope in each hand so that your palms face in. Raise one arm to shoulder level and then quickly lower back to start, raising the other arm to shoulder level as you do so. Continue alternating as rapidly as possible without losing form.

3. Low Alternating Wave – While the movement for this one is exactly the same as the alternating wave listed above, this version brings your lower body into the equation. Instead of standing, you’ll lower down into a squat, keep your core engaged, and then move your arms as you do with the alternating wave.

4. Shoulder circles – Put your shoulders to work! Though this move looks simple, it’ll yield serious shoulder strength, which is ideal for boxers and swimmers in particular. Stand with feet shoulder-width apart and knees slightly bent. Grasp the rope with palms facing down, lift arms over your shoulders, and move your arms in circles. Perform clockwise circles for 30 seconds, then counter-clockwise for another 30 seconds.

5. Snakes on the Floor – This sneaky move is a killer shoulder workout. Stand facing the anchor and position your feet a little wider than shoulder-width apart, holding the ropes by your sides. Lower into a squat, pulling your arms wide and keeping them parallel to the floor. Without crossing hands, move your arms in toward one another and then back out—your goal is to make the ropes look like two snakes on the floor.

6. Shoulder Press – No need to limit your shoulder presses to barbells and dumbbells—you can totally use battle ropes too! Hold the ropes on your shoulders (make sure there’s tension on the ropes). Press the ropes upward as you straighten arms overhead. Bring them back down to the start position.

7. Power Slam – If there’s one thing we know, it’s that anything with the word “power” in it is bound to be one tough exercise—and this one’s no exception. To start, stand with feet hip-width apart and grasp the ends of the rope in each hand. Bring both arms up overhead, and then forcefully slam the ropes down into the ground, lowering into a high squat as you do. Straighten up to return to standing and repeat.

8. Side Slam – Slam your way to a fitter physique (and obliques). Face the anchor, feet shoulder-width apart, and knees slightly bent. Grab the ends of the rope with palms facing in. Brace your core and hold the rope on the left side of your body. Raise your arms up overhead and forcefully slam the ropes down to the right of your body. Continue alternating sides.

9. Alternate-Arm Power Slam – A variation on the power slam listed above, you’ll be executing the exact same movement, but instead of raising and slamming both hands at the same time, you’ll restrict the movement to one arm. Do one whole set of the move with one arm and then another set with the other arm.

10. Plyo Knee-tuck Slam – Assume the position—the push-up position, that is. With one end of the rope in each hand and palms facing in, jump both feet into the air and draw your knees in toward your chest (this is the knee tuck—which looks similar to a plank tuck jump, except you won’t ever land with your knees tucked in). Immediately shoot legs back out into push-up position, and then explosively jump to your feet (a little wider than hip-width apart) with the ropes in hand. Raise arms overhead as you extend your body until you’re on your toes. Lower down into a squat, slamming the rope down to the ground as you do. Return to the push-up position.

11. Plyo Knee-Tuck Push-up Slam – This combo move not only builds total-body strength, but it also works on explosive power, Wilson says. Plus, it adds an extra challenge to plyo knee-tuck slams. Begin in a push-up position, with one end of the rope in each hand. Jump knees in toward your chest and then immediately shoot legs back into the push-up position. Lower your body into a push-up, and then explosively spring up to standing, keeping hold of the ropes. Raise arms overhead as you extend your body until you’re on your toes. Lower down into a squat as you slam the rope down to the ground. Place hands on the floor and return to a push-up position. That’s one rep—phew!

12.Alternating Wave Lunges Jump – Now that you’ve mastered lunging and waving, up the ante even more. Begin with the alternating wave. Step your right leg back into a reverse lunge, and then jump up into the air, switching legs so that you land with your left leg extended back. Continue alternating as smoothly as possible and without losing form—you’re going to want to keep your head and chest up throughout this move too.

13. Alternating Wave Jump Squat – Paired together, squats and alternating waves make for one total-body toner—it even targets your core. Perform low alternating waves, and once your waves are nice and steady, jump up into the air, landing in a squat. Repeat, and remember to keep the wave going throughout the entire movement.

14. Plyo Knee Tuck Into Push-up to Alternating waves Switch game – The longer the name, the tougher the exercise—and brace yourself: This one’s a doozy. Begin in the push-up position, with one end of the rope in each hand. Perform a knee tuck, a push-up, explode up to stand, and power through alternating waves for 10 seconds. Return to the starting push-up position. And pat yourself on the back.

15. 180-Degree Jumps – Stand so that the left side of your body is facing the anchor and position the ropes in front of you. Grab the ends of the ropes and hold them together with both hands in front of your right hip, palms facing each other. Lower into a squat and jump up, turning toward the anchor and rotating your body 180 degrees while you swing the rope overhead. Land softly in a squat, positioning the ropes in front of your left hip. Repeat on the other side, landing back in the starting position.

16. Star Jumps – Star jumps, as their name suggests, are outta this world. But make no mistake: This move will jack up your heart rate and make you feel the burn, especially when battle ropes are involved. To start, stand in a narrow squat and grab one end of the rope in each hand. Jump up, kicking your legs out to the sides and swinging arms (and the ropes) out to the sides and over your head. Land softly in a squat position, with hands in front of your hips.

17. Alternating Wave Reverse Lunge – Waves, and lunges, and battle ropes, This exercise is great for not only your upper body, but your lower body as well, targeting your quadriceps, forearms, biceps, back, and abs.
Begin with the alternating wave exercise (see No. 2 for a reminder). Once you get a good wave going, step your right leg back into a lunge. Return to standing and then repeat on the other side, stepping your left leg back into a lunge. Continue alternating legs as you make waves with your arms (and the ropes), keeping your head and chest up throughout the entire exercise.

18. Up-Downs into Snake Switch Game – Begin in a standing position and grab the rope in each hand, holding the ends by your sides. Drop your body to the floor and catch yourself with your hands (place them in a push-up position on the floor beneath you as you land), letting your chest touch the ground—similar to this, except you won’t do the shuffle movement. Explode back up to stand, and then lower your body into a squat. Pull arms wide and keep them parallel to the floor. Without allowing your hands to cross, move arms in toward one another and then back out as quickly as you can—it’s the snake movement again! Return to stand.

19. Squat to Overhead Press – How do you make a shoulder press even better? Add a squat to the mix! Position your feet a little wider than shoulder-width apart and hold the ropes on your shoulders (you’ll want to make sure there’s tension in the ropes like you did with the regular shoulder press). Lower down into the perfect squat while simultaneously pressing the ropes overhead. Return to stand.

20. Lateral Shuffle with Alternating Wave – Get ready to get moving—even more, that is. Begin by doing the good ol’ alternating waves. Quickly shuffle to one side, whipping the rope and shuffling at about the same tempo. When you’re ready to shuffle back, lower your body into a squat and shuffle in the opposite direction.

Related image


Click here for Exercise with Jump Rope ( Skipping Rope ) -

In this post, we’re excited to bring you the perfect beginner jump rope workout routine.

If you’re just getting started with your jump rope training journey or if you just got your jump rope set and you’re wondering what fitness jump rope workout routine to try, then this simple 15 minutes fitness jump rope workout is perfect for you and you can learn and use anywhere to make your workouts more effective.

You’ll learn what exercises to focus on, what technique tips to pay attention to, and even how to break this workout apart and rebuild it to make it your own.

Whether you’re new to jumping rope or you’ve been at it for years, it’s always fun and exciting to learn new skills and add new exercises to your workout Schedule.

Benefits of Jump Rope Exercise – Before we dive into our list of jump rope exercises, we want to explain some of the benefits of these exercises as well as how you can make use of them to achieve your fitness goals.

The jump rope is a versatile training tool. It gives you the freedom to take your workouts on the go, burn more calories, improve your cardio, and achieve your fitness goals without getting bored at the gym.

But one of the best parts about the jump rope is that you’re constantly learning. You’re constantly being challenged as you start learning new jump rope exercises and skills. And this beats a monotonous run or a boring treadmill session any day of the week.

So go ahead and explore these jump rope exercises. Learn the basic jump first, then choose a couple from the list that you want to add to your workouts. Use them in your warm-up. Use them as a workout finisher. Build workouts around them.

We suggest following jump rope exercises:

Jump Rope Basic Jump – The basic jump is the most fundamental jump rope exercise every beginner needs to learn. It’s a simple exercise that we use frequently in our workouts, particularly with heavy ropes. If you’re new to jumping rope, we recommend learning this exercise before moving to any of the other exercises in this list.

Jump Rope Alternate Foot Step Jump – is one of the most effective and frequently used jump rope exercises that you will have in your repertoire. This our go-to exercise for any high-intensity workouts and weight loss fitness challenges because of the level of intensity that can be achieved. If you really want to push yourself, try this exercise at the max pace with a heavy rope.

Jump Roe Boxer Step Jump – The boxer step jump is a classic jump rope exercise that boxers have popularized. The boxer step jump allows you to jump for longer periods at a time because you’re constantly shifting your weight from one side to the other. It’s a great exercise for improving your endurance.

Jump Rope High Knees – The High Knee Step is a higher-intensity variation of the alternate foot step jump. This skipping exercise will get your heart rate up quickly and give you the ability to do some really effective fat-burning workouts.

Jump Rope Jacks –  are fun for all levels of jumpers. This jump rope exercise will improve your coordination and give you a fun new way to do your basic jumps. Along with the alternate footstep, this is a great exercise to add after you learn the basic jump.

Jump Rope Mummy Kicks – are fun to learn and easy for beginners. If you’re looking to add some variety to your workouts, try adding these to your repertoire. Check out the full tutorial below.

Jump Rope Criss-Cross – is a very popular jump rope exercise. This skill requires a little more time and patience to master, but once you get it you will be able to target your upper body muscles more effectively in your workouts. It also looks pretty bad-ass.

Jump Rope Side Swing – The side swing is a simple exercise that will make it. Not only does it look sleek, but it also gives you the ability to actively rest during your workout. When used with heavy ropes, side swings can also offer an upper-body workout, anywhere.

Side Under Jump – This looks more challenging than it actually is. It’s a great exercise for adding variety to your workouts and it’s what you’ll want to work towards once you have some of the other exercises mastered.

Jump Rope half and Full Twist – The half twist and the full twist exercises are fun variations of the basic jump. Tip: get the motion and rhythm down first before you try it with a rope in your hands.

Jump Rope Single Foot – While we don’t use them often in our workouts, single-foot jumps are fun to learn. They’ll help you improve your balance, coordination, and ankle strength. Keep in mind that any single footwork will place more stress on your calves, so don’t use this one until you feel ready. Always go at your own pace.

Jump Rope Heel Toe Step – The heel-toe-step jump is great for footwork and coordination. It’s a fun skill that you can utilize in any jump rope workout. Pay attention to the foot pattern shown in the tutorial video below.

Double Unders – is one of the most sought-after jump rope exercises. Popularized by Cross Fit circles, this is a challenging, high-intensity exercise that can really take your workouts to the next level. But the double undertake time and patience to master. In fact, we’ve built an entire (free) comprehensive double under guide to help you learn this skill.

Criss-Cross Double Unders – This is a highly advanced and explosive jump rope exercise that we don’t recommend trying until you feel very confident with the standard double under. However, it’s a great exercise for building power, strength, and endurance.

Backward Jumping – The great thing about backward jumping is that you can essentially do all of the exercises above backward which means you’re doubling your exercise repertoire. Learning to jump backward will improve your coordination and feel for the rope. Check it out below.

If you’re just looking for some quick tips on improving your technique, here are some important ones to keep in mind when you’re jumping:

  • Focus on maintaining good symmetry while you’re jumping. This will ensure that you have a nice open loop to jump through. Watch the beginning of the video for details.
  • Make sure you’re using your wrists to turn the rope (not your elbows or shoulders). Good wrist rotation is the key to good rope rotation.
  • Maintain a light bound all the way through. Don’t jump too high or bring your knees up or kick your feet back. Watch the feet during the video for reference and pay attention to the slight knee bend (important for shock absorption).
  • Maintain a good rhythm throughout the workout. As you get better, you can increase the pace of your jumps.

The Perfect Jump Rope Workout – So why is this the perfect workout for beginners?

Because it’s fun, versatile, quick, and it offers a lot of flexibility.

In order for a workout to be effective, it needs to have a fun factor. Workouts that we don’t enjoy are rarely the ones we tend to stick to and when it comes to long-lasting results, consistency is the ultimate factor.

The jump rope is one of those unique training tools that offers a fun spin on exercise as you’re constantly challenging yourself to get better and to learn new skills. With our system, you are able to change the weight of your ropes so you can challenge yourself in different ways, engage more muscle groups, and burn more calories.

Then you have the flexibility to adjust your workout to fit your fitness needs.

Is the workout getting too easy? Up your intensity by increasing the pace of your jumps. Try to squeeze in as many rotations as you can in every 30 seconds or 45-second work session.

Getting tired of the same routine? Try swapping your exercises. Choose your own skills. Choose a couple of unique jump rope exercises and rotate them into your workout.

Want even more of a challenge? Use a heavier rope – instead of the 112 gms Infinity rope, try using the 225 gms Infinity rope, or even the 450 gms infinity rope.

You’ll feel a tremendous difference in the way the same workout makes you work. See how much flexibility you have with the same workout? With just a few tweaks, you can create endless combinations to create the workout that is right for you.

That’s why we call this the perfect jump rope workout routine for beginners. Rope jumping is simple and efficient cardio. It is a popular warm-up exercise and has more to offer than just prepping your muscles for workout sessions.

This full-body workout that athletes and fitness gurus swear by has several health benefits. But skipping, like any other exercise, is not foolproof.  Here are the gains and pains of jumping rope (or skipping).

Powerful health benefits of rope jumping –

Improves heart health – Skipping or rope jumping is a great form of cardio. It increases the heart rate. This allows the heart muscles to work harder to pump oxygenated and deoxygenated blood across the body, thereby promoting heart health.

A 12-week study on the effect of skipping on children confirmed that rope jumping helped reduce the risk of cardiovascular disease.

Tones lower and upper body – Rope jumping is a great full-body workout. It helps shed fat from all parts of your body and tones you up. It will not help build lean muscle, but if you do it at a higher intensity, you will work your biceps, triceps, shoulders, calves, thighs, and glutes.

Burns calories to aid weight loss – Skipping or jumping rope is an amazing way to burn calories and shed fat. In a study, scientists found that rope jumping to dance music helped improve BMI more than stationary cycle exercise. Start with a short session of 2-3 minutes of jumping rope every day. Increase the duration and intensity as you progress.

Improves motor function and stamina – This is the reason most athletes, and especially boxers, practice jumping rope. It is scientifically proven that adding skipping or rope jumping and weighted rope jumping to your exercise routine helps improve coordination, strength, endurance, and balance in young athletes.

Helps improve the immune system – Jumping rope is a great way to boost your immune system. Physical exercise helps lower inflammation, increases the number of T-cells, and improves the function of natural killer cells. But be cautious as too much exertion may make you prone to infections.

Helps improve bone density – Osteoporosis and weak bones are direct causes of low bone density. Jumping rope regularly can help improve bone density. Moderate-intensity rope jumping is also safe for people with osteopenia. It helps increase hip bone mineral density.

Boost mental health – Skipping stimulates the secretion of serotonin, the “feel-good” hormone. This, in turn, helps boost mood and improves mental disorders like depression and anxiety.

Helps children with ADHD – About 5% of children in the US have ADHD (Attention Deficit Hyperactivity Disorder). Research studies have shown that skipping or jumping rope helps children with ADHD. Consult your doctor to know if your child can benefit by jumping rope.

Is easy on your joints – Jumping rope is easy on your joints, thereby lowering the risk of injury of the knees or any other joint. Of course, you must not try rope jumping right after surgery or a critical injury – not until your doctor and physical therapist give you a nod.

Helps improve skin health – Sweating is great for your skin. Sweat helps maintain skin hydration. Moreover, it acts as a barrier to prevent dust, pollution, and microbial growth on the skin. As a result, your skin can turn brighter over a period. Remember, you must also hydrate and eat healthily. 

You can easily include a 5-minute fat-burning skipping in your exercise routine.

How To Include Skipping In My Workout Routine 

Warm-up – 10 minutes

Moderate Intensity Skipping – 4minutes

Jump Squats – 2 sets of 12 reps

Leg In And Out – 2 sets of 12 reps

Russian Twists – 2 sets of 20 reps

Leg up Crunches – 2 sets of 25 reps

30 Seconds Rest

HIIT Skipping – 1 minute, 5 reps with 10 seconds break

Kettlebell Swings – 2 sets of 8 reps

Single-Leg Deadlifts – 2 sets of 6 reps

Mountain Climbers – 2 sets of 15 reps

30 Seconds Rest

Elbow Plank – 1-minute hold

Bicep Curl – 3 sets of 12 reps

Tricep Extensions – 3 sets of 8 reps

Chest Press – 3 sets of 8 reps

Shoulder Press – 3 sets of 8 reps

Moderate Intensity Skipping – 5 minutes

Cooldown stretches –10 minutes

Precautions To Take

  • Warm-up for at least 10 minutes before jumping rope.
  • Wear shock-absorbing shoes.
  • Wear a sports bra to prevent the sagging of breasts.
  • Sip electrolyte water before and after the workout.
  • Cooldown by stretching.

Now, let’s address a common question:

How Long Should I Jump Rope?

Start with 1-minute rope jumps. Increase the intensity and time as you become comfortable. Increase the time every week by at least 1-2 minutes. You should be able to jump rope for 10 minutes straight. However, take breaks, sip on your electrolyte drink, and get jumping again.

  • For weight loss – 10 minutes, two times a day.
  • For strength and conditioning – 10-15 minutes, two times a day.
  • For improving muscle tone –Do high-intensity skipping for 1 minute and take a break for 10 seconds. Repeat for 5 minutes.

Now, let’s discuss when it is not advisable to jump rope.

Avoid Rope Jumping If 

  • You have heart problems. Do it only if your doctor gives you a green signal.
  • You are recovering from a serious illness or surgery.
  • You have high blood pressure. Take your doctor’s opinion.
  • You have a bone injury.

Conclusion 

Rope jumping is a great exercise. Keep the basics in mind. Ease your body into it slowly and keep it steady, but progressive. Include skipping as an exercise in different workouts. You will surely have fun and also feel energetic and young at heart.

FAQ’s

Can rope skip reduce belly fat?

Yes, skipping can help reduce belly fat. But make sure you eat healthily and do lower belly exercises.

How much should you skip a day?

You can start by doing 1-2 minutes of skipping in a day. Increase the time to 10-15 minutes as you progress.

Can skipping reduce thigh fat?

Yes, skipping helps reduce thigh fat. It is a good calorie burner. You should also do these leg exercises to tone your thighs.

Does skipping help get bigger buttocks?

No, skipping will not help increase the size of your glutes. But it can help reduce fat from your butt. Read this post if you want to increase the size of your buttocks.

Related image

Click here for Flexibility Training -

Flexibility is more than being able to touch your toes, it’s about general musculoskeletal health. While some people are born with natural flexibility, it doesn’t mean that those who aren’t are doomed to have it beyond their grasp. Exercises that facilitate flexibility and mobility, like stretching are often neglected or deemed as ‘not proper’ exercise, as exertion seems minimal at first glance.

Disregarding this kind of training from your regular routine is actually doing you a disservice as compromised mobility can limit your range of motion, and stunt your fitness goals, or in the worst case can lead to injury down the line.

Here are some styles of flexibility training that both complement different types of workouts, as well as include strength elements within them.

Stretching

Every stretch can be either static or dynamic and passive or active. Dynamic and active stretches are more helpful for improving functional movements used in everyday life and sports. Here’s a breakdown:

  • Static stretching is isometric (developing muscular tension without contraction of the muscle), you hold a challenging position for at least 20-30 seconds.
  • Dynamic stretching is a stretch performed by moving through a challenging but comfortable range of motion repeatedly.
  • Passive stretching uses external “assistance” to help you stretch. It’s a technique where you relax into a stretch while an external force (someone or something) intensifies the stretch further.
  • Active stretching applies motion, so you relax the muscle you’re trying to stretch and rely on the opposing muscle to initiate the stretch.
  • Ballistic stretching is uncontrolled, erratic, and jerky. It can be a form of passive stretching or a dynamic stretching in a fast, bouncing motion, forcing the limb into an extended range of motion.
  • PNF (Proprioceptive neuromuscular facilitation) is a contract-stretch-hold technique repeated 10-12 times, and research says it may be the most effective stretching technique for increasing range of motion.

Yoga

These days yoga boasts as many styles of the practice as there are ranges of activewear brands. Hatha, Ashtanga, Iyengar, hot yoga, vinyasa flow, Kundalini, and yin are a few of the most commonly known ones.

What all these practices have in common is the integration of body and breath through stretching, isometric bodyweight exercises, and moving meditation. Regular practice will help mobilize joints, stretch ligaments, and strengthen muscles — in summary, keep you limber.

Pilates

Developed by Joseph Pilates, this method of exercise incorporates controlled movements with an emphasis on alignment, breathing, and building the core — referred to by Pilates instructors as the “Powerhouse”. Over time Pilates will not only increase flexibility but help improve coordination, balance, and all-round stability.

Mobility work

If you’re looking to release tight, sore muscles after a killer workout, then you may want to check out foam rolling. This form of mobility work, along with other devices like lacrosse balls for trigger points, is an indispensable part of any regular workout regime. Foam rolling offers deep tissue release and can be done pre-workout to warm muscles up or post-workout to alleviate tension.

Reaping the rewards of exercise variety

Now you’ve got the lowdown on the importance of including different types of workouts into your routine and what kinds are out there, you may be interested in how this will impact your overall health and fitness.

Benefits of cardio:

  • Improves cardiorespiratory and pulmonary health, measurable by a lower resting heart rate
  • Reduces blood pressure
  • Reduce risks of a stroke, heart disease, and eventual heart attack
  • Increases circulation
  • Lowers the risk of diabetes

Flexibility training:

  • Increases range of motion
  • Releases tension physically and mentally
  • Supports spinal musculoskeletal health
  • Improves mobility
  • Reduces the risk of injury associated with other exercises and movements


Related image

Related image

Related image

Home Exercise for All-I

Image result for images of home exercise

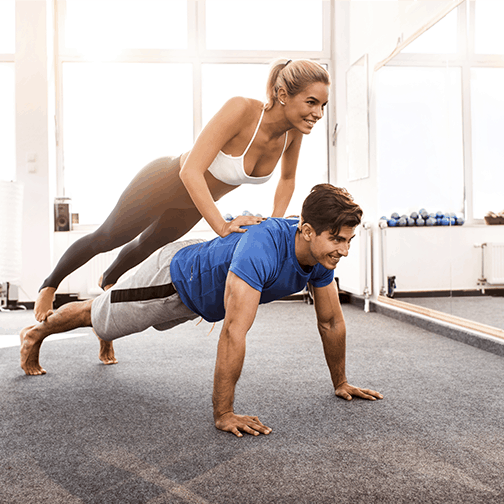
When people think about working out to lose weight, they often assume that to mean strenuous cardio and resistance training at the gym. But what if you are not ready to commit to a gym membership or simply can’t afford one? Fortunately, there are still ways to lose weight and build muscle in the comfort of your own home. If performed correctly and consistently, home workouts can be every bit as effective as a gym workout.

Each of the recommended routines focuses on strength training. The rationale for this is simple: building muscle through strength training helps to boost your metabolism and burn fat. While you will want to eventually incorporate cardio into your workout, start by getting the basics correct. By seeing and feeling the results early on, you will be more likely to keep with the program over the long term.

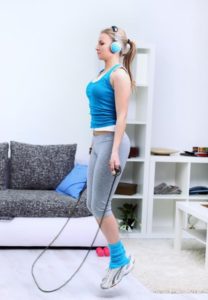
The simplest way to work out at home is to use your own body. There are a variety of effective body weight exercises that can help you build strength, endurance and burn calories. The downside is that, without added resistance, it’s tough to work hard enough to really challenge your body and burn calories. By going from one exercise to the next, without little or no rest, you keep your heart rate up, burn more calories and get the most out of your exercise time.

Image result for images of home exerciseImage result for images of home exercise

Click here for Body weight Exercises you can do at home-

You’ve probably heard people say things like, “You don’t need any equipment to have a great workout,” and “You can do these bodyweight exercises anywhere,” a hundred times. And honestly that’s great news because getting to the gym every day isn’t always a reality. But it’s not just a question of convenience (although, yes, they are convenient).

While you might think of strength training as requiring heavy weights and maybe some grunting (for good measure), the truth is that your body is itself a fantastic piece of workout equipment. Just by using the weight of your body and the power of gravity, you can build muscle, burn fat, and get an honest-to-goodness great workout. You just have to know the most effective way to put your body to work—for your body.

Keep these 53 handy moves in your at-home arsenal to work up a sweat anytime, anywhere. There are some effective bodyweight exercises for biceps and your entire upper body, as well as moves for your lower body and your core. And they aren’t just bodyweight exercises to build muscle—there are plenty of cardio-focused moves, too, which will get your heart rate up so you’re burning calories while working your muscles.

Create your own time table of a week mixing following  exercises daily so that all are included in weekly program. We are sure you will always remain slim, healthy with toned body.

Start by adding one or two of these exercises to your routine. You can then mix it up as you get stronger, creating workouts of six to seven exercises of your choice (focusing on the upper body, lower body, overall body, or core).

Create your own bodyweight workouts with these exercises—know them, love them, crush them.

Squats –

  • Stand with your feet about shoulder-width apart and slightly turned out with your weight in your heels.
  • Hinge your hips to sit your butt back and bend your knees until your thighs are parallel to the ground.
  • Drive through your heels to stand back up straight. Squeeze your butt and keep your core tight as you stand.

Reverse lunges –

  • Start standing with your feet about shoulder-width apart.
  • Step backwards with your left foot, landing on the ball of your foot and bending your knees to create two 90-degree angles.
  • Push through your right heel to return to standing.
  • Repeat on the other side.

Lateral Leg Raises –

  • Start standing with your feet about shoulder-width apart.
  • Step backwards with your left foot, landing on the ball of your foot and bending your knees to create two 90-degree angles.
  • Push through your right heel to return to standing.
  • Repeat on the other side.

Marching Glute Bridge –

  • Lie faceup on your mat with your knees bent and feet flat on the floor. Lift your hips off the mat into a bridge.
  • Keeping your right knee bent, lift your right foot off the floor. Try to keep your hips still.
  • Hold for five seconds. Slowly lower your right foot to the ground but keep your hips lifted.
  • Lift your left foot off the ground to repeat on the other side.

Spider-man Mountain Climbers –

  • Lie faceup on your mat with your knees bent and feet flat on the floor. Lift your hips off the mat into a bridge.
  • Keeping your right knee bent, lift your right foot off the floor. Try to keep your hips still.
  • Hold for five seconds. Slowly lower your right foot to the ground but keep your hips lifted.
  • Lift your left foot off the ground to repeat on the other side.

Skater Hops –

  • Starting at the left of your space, squat slightly then jump to the right as far as you can.
  • Land on your right foot and try not to touch your left foot down.
  • Jump back across to land on your left foot.

Donkey Kicks –

  • Start on all fours.
  • Pull your right knee toward your chest, keeping your foot flexed.
  • Then, kick your right leg up behind you and toward the sky, then back down, keeping your knee bent and foot flexed.
  • Repeat on the other side.

Standing Oblique Crunches –

  • Stand with your feet hip-width apart and hands behind your head and elbows wide.
  • Lift your left knee toward your left elbow while you bend your torso up and over to the left.
  • Repeat on the other side.

Single-leg Glute Bridges –

  • Lie on your back with your knees bent and feet flat on the floor.
  • Lift your left leg straight up above you, toes pointing at the ceiling. Your left knee should be directly over your left hip.
  • Raise your hips and lower them back to the ground, keeping your leg in the air.
  • Repeat on the other side.

Donkey Whips –

  • Start on all fours.
  • Lift your right leg, extending it behind you.
  • Swing your right leg to the right side and then back to center.
  • Repeat on the other side.

Curtsy Lunges with Side Kick –

  • Stand tall with your feet hip-width apart.
  • Step your left leg diagonally behind your right leg and bend your knees to lower into a lunge.
  • Push through your right heel to stand, and sweep your left leg out to the side.
  • Repeat on the other side.

Wide-Grip Push-ups –

  • Start in a high plank position with your hands flat on the floor a little bit wider than shoulder-width apart, wrists under shoulders.
  • Keeping your body in one long line, bend your arms and lower yourself as close to the floor as you can.
  • Push back up to start.

Froggers –

  • Stand with your legs wider than hip-width apart, knees bent, and upper body hinged slightly forward.
  • Place your hands on the ground in front of you, then jump your straight legs back into a high plank.
  • Jump your feet to the outsides of your hands and bring your hands toward your chest to return to the starting position.

High Knees –

  • Stand with your legs wider than hip-width apart, knees bent, and upper body hinged slightly forward.
  • Place your hands on the ground in front of you, then jump your straight legs back into a high plank.
  • Jump your feet to the outsides of your hands and bring your hands toward your chest to return to the starting position.

Plank Jacks –

  • Stand with your legs wider than hip-width apart, knees bent, and upper body hinged slightly forward.
  • Place your hands on the ground in front of you, then jump your straight legs back into a high plank.
  • Jump your feet to the outsides of your hands and bring your hands toward your chest to return to the starting position.

Side Lunges –

  • Stand with your legs wider than hip-width apart, knees bent, and upper body hinged slightly forward.
  • Place your hands on the ground in front of you, then jump your straight legs back into a high plank.
  • Jump your feet to the outsides of your hands and bring your hands toward your chest to return to the starting position.

Side Step Squats  –

  • Stand tall with your feet together and hands on your hips.
  • Step your right foot to the right, so your feet are just wider than shoulder-width apart.
  • Drop your butt back and bend your knees to lower into a squat.
  • Straighten your knees and bring your foot back to the starting position.
  • Repeat on the other side.

Lateral Plank Walks –

  • Start in a high plank with your shoulders above your wrists and abs tight.
  • Step your right foot and right hand to the right, immediately following with your left foot and left hand. Take a few “steps” in one direction, then walk in the opposite direction.

Forward to Reverse Lunges –

  • Stand with your feet hip-width apart.
  • Step forward with your left foot into a forward lunge, with both knees bent so that your knees so that the front thigh is parallel to the floor and the back knee is about two inches from the floor.
  • Push off your front foot, hover your foot as you stand straight up, and immediately step back into a reverse lunge.
  • Drive through your front foot to stand back up.

Push-ups –

  • Start in a high plank position with your hands flat on the floor about shoulder-width apart, wrists under shoulders.
  • Keeping your body in one long line, bend your arms and lower yourself as close to the floor as you can. Your elbows should be at about a 45-degree angle to your torso.
  • Push back up to start.

Jump Squats –

  • Stand with your feet slightly wider than hip-distance apart.
  • Sit your butt back and bend your knees to drop into a squat, keeping your chest upright.
  • Jump up into the air as high as you can and straighten out your legs.
  • Land back on the floor with soft knees.

Forward Lunges –

  • Stand with your feet together.
  • Take a big step forward with your right foot. Bend your right leg until your front thigh is parallel to the floor and your back knee is just barely touching the floor.
  • Push up through your back front heel to return to the start position.
  • Repeat on the other side.

Plank Ups –

  • Start in a high plank. Bend one arm to bring the elbow and forearm to the floor.
  • Bring the other arm down so you are in a forearm plank.
  • Push back up to the start position, placing each hand where your elbows were.
  • Repeat this pattern, alternating which side you lower first with each rep.

Squat Jacks –

  • Start standing with your feet together, hands at your chest.
  • Jump your feet out and sit back into a small squat.
  • Jump your feet back together to return to standing.

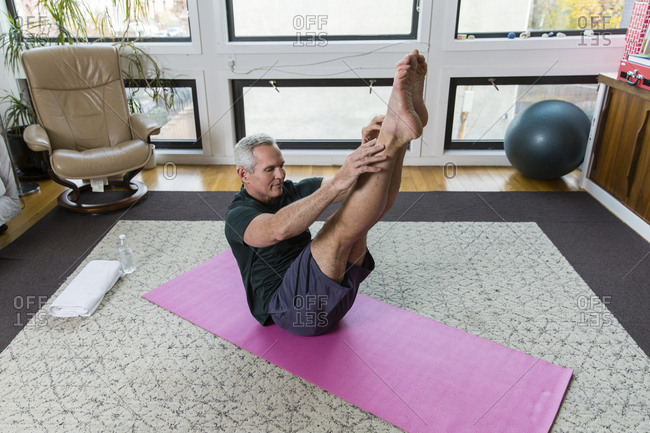
Extended Leg Pulses –

  • Bring your right knee to your chest and extend the right leg to the ceiling. Keep your left leg extended and off the floor about 3 to 5 inches.
  • Interlace your fingertips behind your right knee.
  • Using your abs (not your hands), pulse your upper body up 3 to 5 inches. Make sure your low back stays planted firmly on the floor.
  • Repeat on the other side.

Hip Bridges –

  • Start lying flat on your back, your knees bent and your heels a few inches away from your butt. Your feet should be about hip-distance apart.
  • Lift your hips up, then lower them back to the ground.

Fire Hydrants –

  • Start on all fours.
  • Lift your right leg to the side, keeping your knee bent, until your knee reaches hip height.
  • Lower to start, hovering your knee above the ground.
  • Repeat on the other side.

Power Lunges –

  • Stand with your feet hip-width apart.
  • Lunge back with your right foot, bending both knees 90 degrees.
  • Straighten your left leg and jump into the air while driving your right knee up in front of your body.
  • Immediately lower your right foot back into a lunge.
  • Repeat on the other side.

One-legged Balance Taps –

  • Stand with your feet together, arms straight at your sides.
  • Slowly hinge forward at the hips, keeping your back flat as you lift your right leg out straight behind you and reach your right arm down toward the floor.
  • At the bottom of the movement, your torso and right leg should be almost parallel to the floor.
  • Keeping your core tight, stand up straight, keeping the right leg straight (and keeping the weight in your left foot).
  • Repeat on the other side.

Trunk Rotations –

  • Start in a high plank with your core engaged.
  • Bring your left knee underneath your body toward your right elbow by twisting your torso slightly.
  • Repeat the movement alternating sides.

Plie Squat Pulses with One Foot Raised –

  • Start standing with your feet wide and your toes slightly turned out.
  • Bend your knees into a slight squat and lift your left heel so you’re on your toes. Keep your right foot flat on the ground.
  • Lower your butt a few inches toward the ground while keeping your chest up. Continue pulsing up and down.
  • Repeat on the other side.

Single-leg Kickbacks –

  • Start on all fours with your knees under your hips and hands under your shoulders.
  • Lift your left leg and flex your foot as you kick it back behind you and straighten your leg.
  • Return to start.
  • Repeat on the other side.

Burpees –

  • Stand with your feet shoulder-width apart, arms by your sides.
  • Bend your knees and reach forward to place your hands on the floor.
  • Kick your legs straight out behind you and immediately lower your entire body down to the ground, bending at the elbows.
  • Use your arms to quickly push your body back up and hop your legs back under your body.
  • Jump straight up into the air, reaching your arms overhead. End with your knees slightly bent.

Single-leg Reach and Jumps –

  • Stand with feet hip width apart, hands at your sides.
  • Hinge at your hips and bend your knees to extend your left leg behind you (no higher than your hips) as you reach your left arm to ground about a foot ahead of where your left foot was.
  • Drive your left knee up to return to an upright position, and hop on your right foot.
  • Repeat on the other side.

 Plank Taps –

  • Start in a high plank with your feet hip-width apart.
  • Tap each hand to the opposite shoulder while engaging your core to keep the hips as still as possible.

Side Kicks –

  • Stand next to a wall, far enough away so that you can bend your torso forward and press your palms against it, elbows bent.
  • Place both hands on the wall. Lift your right leg off the ground, parallel to the floor.
  • Bring your right knee in toward your right elbow. Then, flex your foot and kick the leg back out straight to the parallel position.
  • Repeat on the other side.

Bear Planks –

  • Start on your hands and knees in tabletop position with your wrists above your shoulders and your knees below your hips.
  • Lift your knees just a few inches off the ground. Use your core to balance and keep your back flat.
  • Slowly tap your hand to your opposite knee. Repeat, alternating sides.
  • Keep your torso still and try not to twist your body.
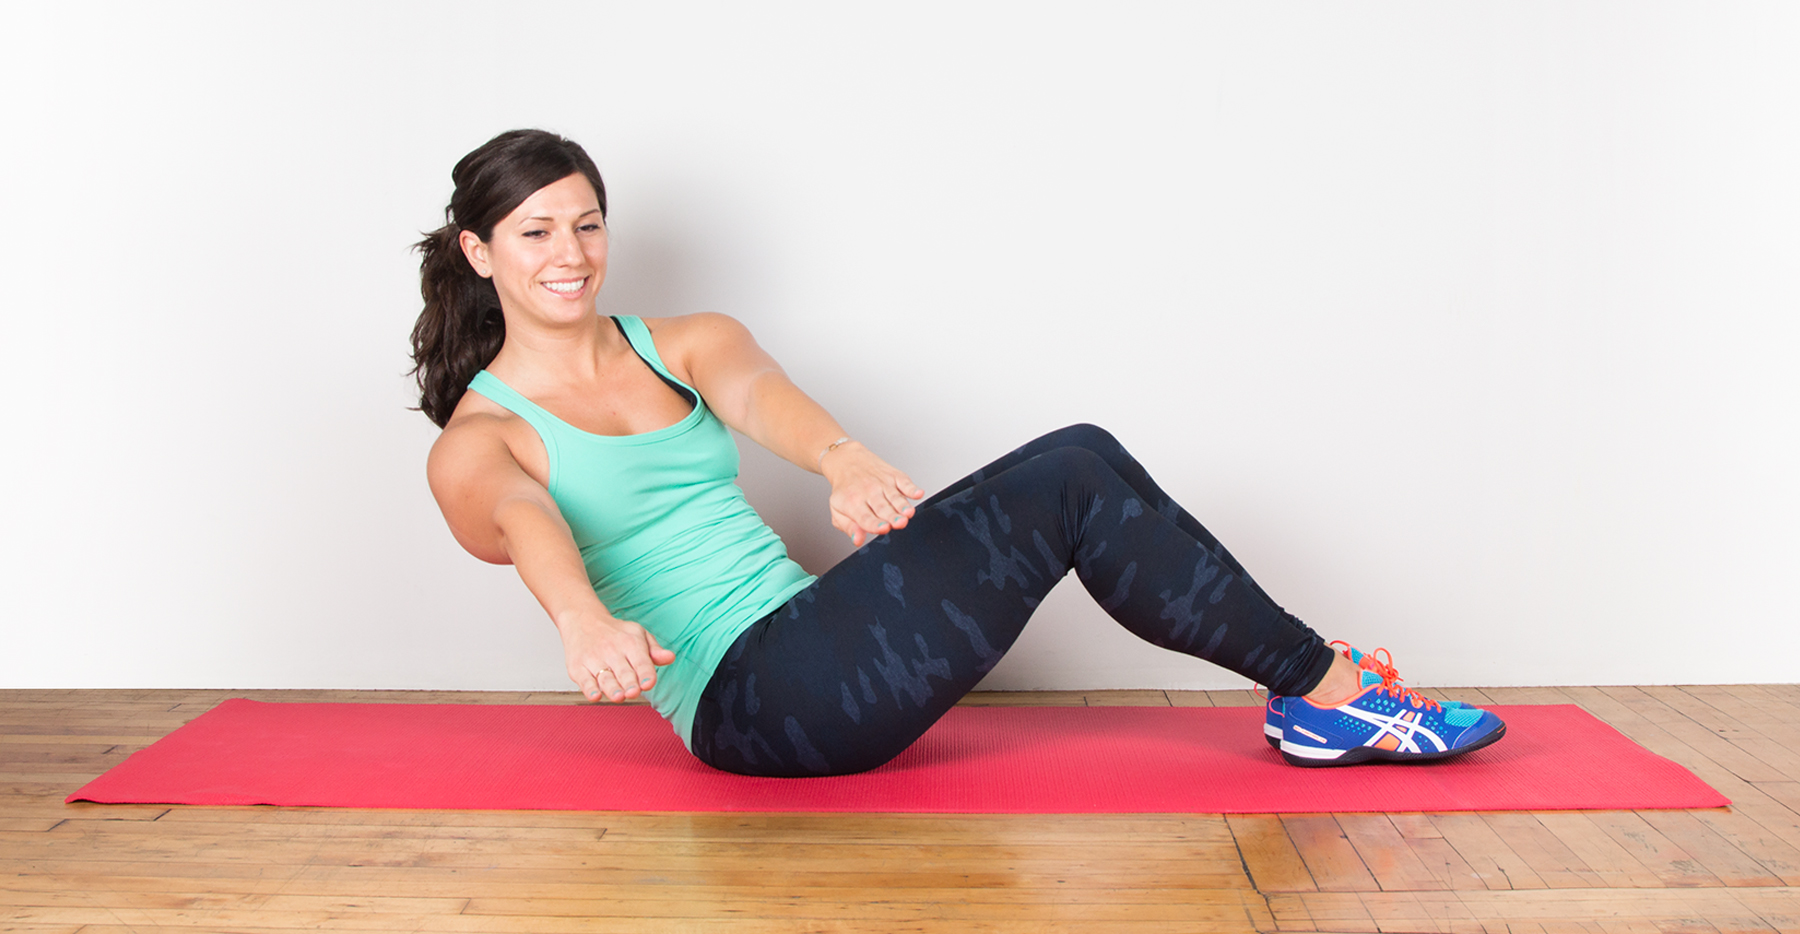
Bicycle Crunches –

  • Sit on floor with your knees bent, feet lifted, and your hands behind head.
  • Keep your chest up and back straight as you lean back to engage your abs.
  • Twist to bring your right elbow to your left knee, straightening your right leg.
  • Alternate sides with control.

Forearm Side Planks Twists –

  • Start in a forearm side plank on your left side with your left elbow on the floor below your shoulder.
  • Place your right arm behind your head.
  • Rotate your torso toward the floor, bringing your right elbow to meet your left hand.
  • Repeat on the other side.

Alternating Knee-to-Chests –

  • Lie on your back and extend one leg out a few inches off the ground. Hold the opposite knee into your chest.
  • Switch legs, bringing your nose to the knee that is in toward your chest each time.
  • Keep your lower back down, head lifted off the ground, and abs engaged.

Single-Leg Walk Out to Push-ups –

  • Start with your feet hip-width apart, hands at sides. Lift your left leg slightly off the ground.
  • Bend at your hips to reach hands to floor and crawl out to a high plank, keeping your left leg hovering off the ground.
  • With shoulders over wrists and abs engaged, do a push-up.
  • Crawl your hands back to your feet and stand.
  • Repeat on the other side.

Diamond Push-ups –

  • Start in a high plank. Walk your hands together so that your thumbs and forefingers form a triangle.
  • Bend your elbows to lower your chest and torso toward the floor and then push back up.

Plank With T-Rotations –

  • Start in a high plank with your feet hip-distance apart.
  • Now rotate your entire body to the right into a side plank with your shoulder above your wrists.
  • Extend your right arm to the ceiling and continue to drive your hips up.
  • Return to center position, then repeat on the opposite side.

Bird Dog Crunches –

  • Start on your hands and knees in tabletop position with your wrists above your shoulders and your knees below your hips.
  • Inhale and extend your right arm forward and left leg back, maintaining a flat back and keeping your hips in line with the floor.
  • Squeeze your abs and exhale as you draw your right elbow to your left knee.
  • Extend back out to start.

Down Dog Abs –

  • Start in down dog and lift your right leg into the air. This is your down dog split position (also known as three-legged down dog).
  • Bring your right knee under your torso. Pause then extend your right leg back to down dog split.
  • Now bring your right knee to meet your right elbow. Pause then extend your right leg back to down dog split.
  • Finally, bring your right knee across your torso to meet your left elbow. Pause then extend right leg back to down dog split.
  • Repeat the same sequence on the other side.

Side Plank Dips –

  • Start in a side plank, with your left foot stacked on top of your right and your body in a straight line.
  • Drop your hips toward the floor and raise back to starting position (or a little higher, if you can).
  • Repeat on the other side.

Mountain Climbers –

  • Start in a high plank and draw your right knee under your torso, keeping your toes off the ground.
  • Return your right foot to the starting position.
  • Switch legs and bring your left knee under your chest. Keep switching legs as if you’re running in place.

Plank Hops –

  • Begin in a high plank with your feet together.
  • Tighten your abs and jump your feet to the right, bringing your knees toward your right elbow.
  • Jump your feet back to plank and repeat on the other side.

Side Plank Rotations with Kick –

  • Start in a high plank with your shoulders over wrists, abs engaged, and glutes tight.
  • Lift your left foot and kick it under your torso toward the right side of your body. At the same time, reach your right hand to touch your left foot, balancing on your left arm and right leg.
  • Repeat on the other side.

V-Ups –

  • Lie faceup with your arms and legs extended and resting on the floor.
  • Keep your abs tight and lift your hands and feet to meet over your torso, rolling your core as you sit up.
  • Lower your arms and legs back to the floor.

Dead Bugs –

  • Lie on your back with your arms at shoulder level raised toward the ceiling. Bring your legs up into tabletop position (knees bent 90 degrees and stacked over your hips).
  • Slowly extend your right leg out straight, while simultaneously dropping your left arm overhead. Keep both a few inches from the ground.
  • Bring your arm and leg back to the starting position.
  • Repeat on the other side, extending your left leg and your right arm.

Sit-Ups to Twists –

  • Lie on your back with your knees bent and feet flat to the floor.
  • Place your hands behind your head, engage your core and do a full sit-up. At the top of the sit-up, bring your right elbow to your left knee and twist your body toward that side.
  • Lower back down to start.
  • Repeat this movement alternating sides each time.

Jumping Lunges –

  • Start in a lunge with your left leg forward, hands at your sides. Bend both knees to 90 degrees, keeping your abs tight and back straight.
  • Swing arms to propel your body up, straightening your legs. Land back in a lunge and continue jumping.
  • Repeat on the other side.


Image result for images of home exercise

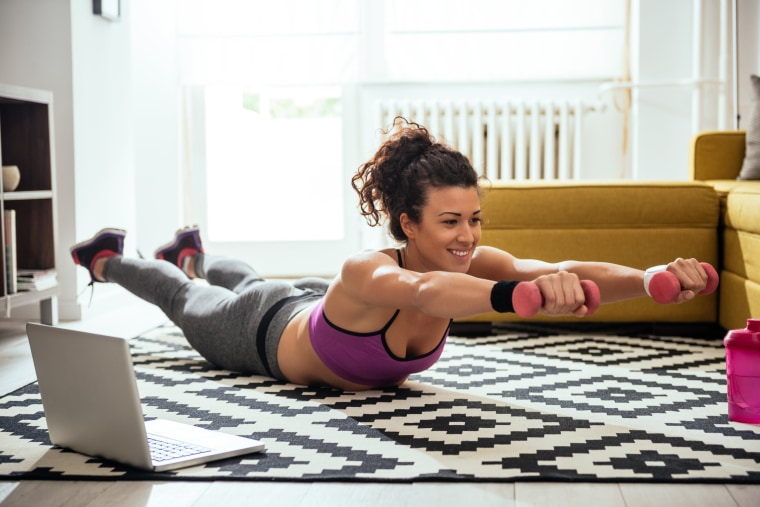
Click here for Simple Home Exercises for women -

It’s no secret that squeezing in exercise around your work, family and social commitments is sometimes tricky to pull off. But it doesn’t have to be that way. Little exercises done here and there still add up to burn calories and make you stronger. And you don’t have to buy equipment, change your schedule or even sweat. Just do this easy home workout throughout the day.

Each one takes a minute or two; by nightfall, you’ll have worked your whole body. So start your transformation—today.

Beginners workout – In this beginner’s workout plan, you will focus on the large muscles that provide you stability and core strength. You won’t need any special equipment. You can do the exercises together in one workout session or split them up throughout the day. ​Take your time with the exercises and modify them to fit your needs.

Total Body Strength for Beginners – 

Precautions: See your doctor before trying this workout if you have any injuries, illnesses or other conditions.

Equipment Needed: Light-medium dumbbells, an exercise ball or chair, and a mat.

How-To Tips:

  • Begin with a 5- to 10-minute warm-up of light cardio (walking in place, etc.)
  • Perform 1 set of 12 reps of each exercise.  For the weighted exercise, choose a weight that allows you to complete 12 reps. The last rep should be difficult, but not impossible.
  • For more challenge, try Total Body Strength 3 which contains more difficult exercises.
  • Do this workout 1 to 3 non-consecutive days a week, taking at least one day of rest between workouts.

Assisted Lunges – 

To perform the assisted lunge, stand in split stance, feet about 3 feet apart using a chair or wall for balance. Keeping torso straight, bend knees and lower body towards the floor without allowing front knee to bend over the toe (you should see the tip of your shoe). Push through the heel to come back up without locking the knees.

Repeat for 1 set of 12 reps and then repeat the series with the other leg forward.  If this bothers your knees, consider alternatives to lunges.

Bird Dog – 

For the bird dog, negin on hands and knees with the back straight and the abs pulled in. Lift the right arm up until it is level with the body and, at the same time, lift the left leg up and straighten it until it is parallel to the floor. Hold for several seconds, lower and repeat on the other side, this time lifting the left arm and right leg.

Continue alternating sides for 12 reps (1 rep includes both the right and left sides).

Seated triceps Extension – 

To perform triceps extensions, sit on a ball or chair and hold a light-medium dumbbell or medicine in both hands (hold on the top of the weight) with arms extended overhead, elbows next to ears, arms straight. Bend elbows and slowly lower weight behind you until elbows are at 90 degrees–keep the elbows in and right next to ears. Contract the back of the arms to extend the arms.

Repeat for 1 set of 12 reps.

Floor Squats with a ball – 

Stand with feet wider than shoulders and place hands on an exercise ball. Roll the ball out as you bend your knees, lowering the hips into a squat.  Keep the abs in, the back straight and make sure you keep the knees behind the toes as you squat. Stand back up as you roll the ball in, squeezing the glutes (avoid locking the knees).

Repeat squats for 1 set of 12 reps.

Wall Pushup – 

For a wall pushup, stand a few feet away from a wall or a high stair railing (as shown) and place hands on wall or rail so that they’re just wider than the shoulders. Pull the abs in and, keeping back straight, bend elbows and lower body towards the wall/rail until elbows are at 90-degree angles. Push back to start.

Repeat for 1 set of 12 reps.

One Arm Row – 

Place left foot on a step or raised platform. You can also prop one knee on a weight bench.

Hold a weight in the right hand and prop the left hand on the left thigh for support as you bend over (back flat and abs in), hanging the weight down towards the floor. Squeeze the back to pull the elbow up in a rowing motion until it is level with the torso. You should feel your lats (the muscles on either side of your back) contracting. Lower the weight.

Repeat for 12 reps before switching sides.

Lateral Raise – 

Stand with feet hip-width apart holding light dumbbells in front of thighs with the palms facing each other. Keep a slight bend in the elbows to protect the joints and lift the arms out to the sides, just to shoulder level. Lower the weights.

Repeat for 1 set of 12 reps.

Hammer Curls – 

Stand with feet about hip-width apart, holding medium dumbbells with the palms facing in. Squeeze the biceps to curl the weights towards the shoulders, keeping the elbows stationary. Slowly lower the weights, keeping a slight bend in the elbows at the bottom.

Repeat for 1 set of 12 reps.

Seated Rotation for Abs – 

Sit with good posture holding a medium dumbbell in front of chest. Keeping the abs contracted, rotate the torso to the right while keeping the hips and legs facing forward. Contract abs to bring the weight back to center and then rotate to the left. Repeat for 12 reps.

Sit with good posture holding a medium dumbbell in front of chest. Keeping the abs contracted, rotate the torso to the right while keeping the hips and legs facing forward. Contract abs to bring the weight back to center and then rotate to the left.

Repeat for 12 reps.

Aim to perform two to three sets involving 10 to 12 repetitions (reps) of each exercise. If you can only do four or six to start, that’s okay. The aim is to perform an exercise so that you are slightly shaky by the final rep. Every week thereafter, aim to increase the reps until you are finally able to do three sets of 12.

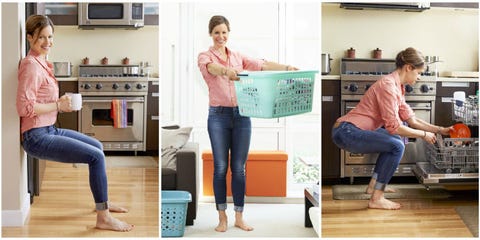
  1. While putting away laundry : Do step workouts : Make 5 trips up and down a set of stairs for each load of laundry you put away. At the bottom of each trip, lift the laundry basket up to shoulder height five times.

TARGETS: Cardiovascular system and arm muscles

  1. While your coffee brews – Do a wall sit :

Rest your back, neck and head against a wall, with feet about a foot and a half away, then bend your knees, slide your body toward the ground until your thighs are parallel to it, and hold for 15 seconds. (Work up to 1 minute.)

TARGETS: Thigh and glute muscles

  1. While emptying the dishwasher  – Do squats : Rest your back, neck and head against a wall, with feet about a foot and a half away, then bend your knees, slide your body toward the ground until your thighs are parallel to it, and hold for 15 seconds. (Work up to 1 minute.)

TARGETS: Thigh and glute muscles

  1. While at the sinks to wash your hands – Do standing push-ups :  Stand about 2 feet from a counter and, with your arms at shoulder height, place your palms against it. Keeping your body in a straight line, do 20 standing push-ups.

TARGETS: Chest and arm muscles

  1. While sitting at a desk – Do desk pushes : Sit in a chair pulled very close to a desk. With your palms facing up, place them under the desk and push up as hard as you can—as if you were trying to lift the desk off the ground—for 30 seconds. Rest for 10 seconds, then repeat twice.

WORKS: Upper body

  1. While lying on bed – Do half-bridges : Lie on your back (no pillow), knees bent and feet flat on the bed. Tighten your stomach muscles, squeeze your buttocks and lift your hips, aiming to create a straight line from your knees to your shoulders. Hold for 15 seconds. (Work up to 30 seconds.) Rest for 10 seconds, then repeat 3 times.

WORKS: Glutes, hips, abs and back

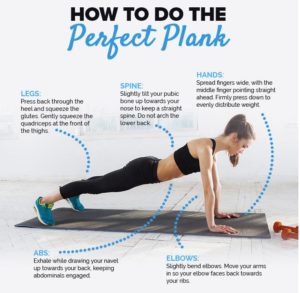
  1. While playing with your kids – Do a Plank : Lie facedown on the floor, then push up your body so just your toes and forearms are on the ground. (If that’s too tough, keep your knees on the ground as well.) If your kids are small, let them crawl on top of you or underneath you.

WORKS: Core

MAKE IT FUN: If your kids are older, turn planks into a competition: Who can hold one the longest?

The type of exercise you choose to do is less important than the consistency of your program. But if you are short on ideas, here are five simple workouts to get you started.

  • Dance. Put on some music, grab your kids, your sweetie, or go solo and groove for at 15-30 minutes. If your neighbors see you in the window, give them a few tips about the benefits of easy exercise and invite them to join you.
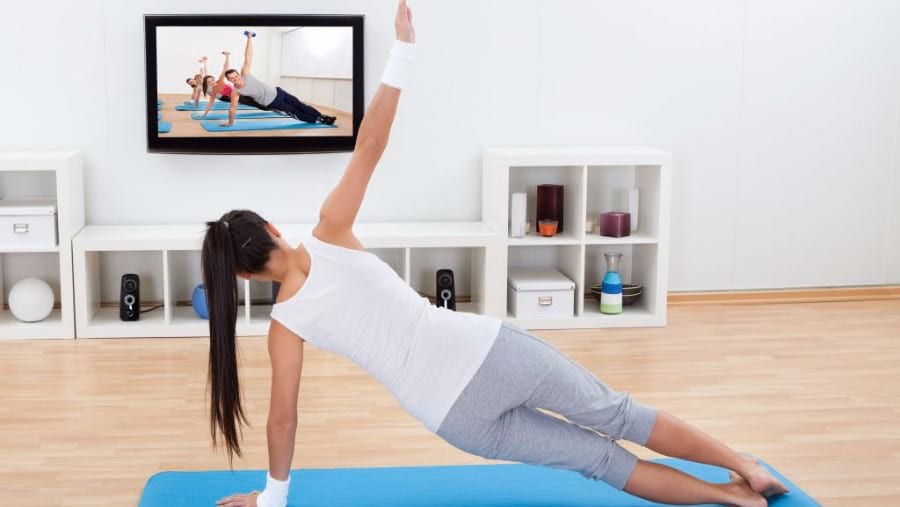
  • Online workouts. If you want to avoid the gym, exercise at home. It’s easy to do with online workouts. Many of them are free and most offer easy workouts for beginners. Plus you can enjoy the benefit of working out in the privacy of your own living room.
  • Bodyweight training. You don’t need any special gym equipment to burn calories and build stronger muscles. Take 10-15 minutes to do simple strength training activities. Try doing 5 incline push-ups against a wall, 5 chair squats, and 5 walking lunges. If walking lunges are too challenging, then do a set of stationary lunges holding on to a countertop for support. Repeat the sequence 2-3 times. Your arms and legs will get stronger and your body will appreciate the extra activity.
  • Chair Workout. If you are not yet comfortable standing for long periods of time, grab a sturdy chair and complete 10-15 minutes of movement with this workout several times each week.
  • Shadowboxing. If dancing isn’t your cup of tea, take advantage of the latest fitness craze and try shadowboxing at home. No equipment is required for this workout and it helps to decrease stress as well.

In this advanced workout program, you will need a set of resistance bands and an exercise ball. These tools can help further strengthen the muscles used for stability.

To create a balanced exercise program, workout two to three times per week. Be aware that your weight may drop at first but then increase slightly as you build muscle mass. By this stage, your success should be measured not only in pounds and inches but how you feel look and feel.

If ever you reach a plateau, simply increase the intensity or duration of your workout. Your body will respond in kind, putting you back on the fast track to weight loss.


Image result for images of home exercise

Click here for Yoga Workout on the exercise Ball -

If you enjoy yoga, there are plenty of ways to shake up your usual routine and one is adding new tools to the mix.

Using exercise ball is just one of those options and a great way to give your body a different kind of support to help you increase balance and flexibility.

The stability ball is a great way to get extra support for moves that require endurance and flexibility and it also adds a balance challenge to some poses.

The lack of stability only adds to the workout, firing up different muscles and strengthening the connective tissue that supports the joints of the body.

The size of the ball makes a difference and you may want to use a smaller ball for some movements. Take your time with these moves and use extra support when needed. Always avoid any exercises that cause pain or aggravate any injuries.

Life can get busy, and oftentimes we find ourselves traveling or otherwise unable to get to our preferred health and fitness facility for a workout. Following exercise will help you stay on track, no matter where you find yourself. Using only your own body weight, these versatile moves can help you create a total-body at-home workout that fits your needs and abilities.

Yoga workout on the exercise ball – 

Equipment Needed : An exercise ball and a mat

How to Do Yoga on the Exercise Ball

  • Perform the exercises as shown, completing 1-3 sets of each exercise.
  • Take your time with the moves and prop the ball against the wall or a sturdy surface if you feel wobbly. If you have a step riser, you can also put the ball on that so that it doesn’t move. Some poses are more challenging than others, so use your best judgment and set the ball aside if you need to.
  • Avoid any exercises that cause pain or discomfort.

Rolling Squats with the ball – 

Stand with feet hip-distance apart and the ball in front of you. Tip from the hips, keeping the back straight and abs in and put the hands on the ball. Squat, sending the hips straight back, and, keeping the knees behind the toes, roll the ball out as far as you can, stretching the arms and chest. Inhale and straighten the knees while rolling the ball back in.

Repeat for 10 reps.

Upward facing dog and downward facing dog – 

Put your ball on the mat and come down to your hands and knees with the ball in front of you. Lean your torso into the ball, rolling forward until your hips are centered on the ball, legs straight out behind you. Press your hands into the ball and inhale as you push the chest up and straighten the arms, looking up in an upward facing dog position.

Exhale and roll forward, placing hands on the floor pushing the body up into an inverted v position, arms and legs straight and heels pressing towards the floor, as in a downward dog. Position the ball so that your chest and upper thighs are supported if you can. If the ball is a larger size, you may need to do this move without the ball.

Inhale and move back into up-dog, alternating each for 10 reps.

Downward dog with leg lift to lunge stretch – 

In the downward dog position with the ball supporting the chest and thighs, inhale and lift the right leg straight up until your body is in a straight line.

Hold for one breath, lower the leg and swing it down to the floor, knee next to the ball. Lean your hips into the ball for support and sweep the arms overhead.

Hold for 3-5 breaths then lift the back knee off the floor, using the ball to support the hips. Hold for 3 breaths and repeat the series on the other leg.

Seated spinal rotation – 

Sit on the ball and, if you need more stability, make sure the ball is against a wall. Extend the legs straight out in front, wider than the shoulders, flex the feet and take the arms straight up and out to the sides at shoulder level.

Sit tall and, keeping the back straight, rotate the torso to the right and reach the left arm out and towards the right foot. Feel a stretch in the hamstring and feel the core contract.

Rotate back to center and then to the left, reaching for the toes. Continue rotating, concentrating on lengthening the spine. Repeat for 10 reps on each side.

Seated Stork Pose – 

This move can be very challenging so you might want to do this onto a chair or prop the ball against the wall for some support. You can also sit sideways to a wall and hold on for balance.

Sit on the ball and cross the right foot over the left knee. This will require you to balance on the left foot while the ball moves, which is very challenging.

When you have your balance, bring the palms together in front of the chest. Inhale and slowly take the arms up overhead, leaning forward to deepen the stretch if you can. Again, this will challenge your balance even more, so modify as needed to stay safe.

Hold for 3 breaths, lower and repeat on the other side.

Warrior I to Warrior II and side angle – 

Get into a lunge position on the ball, right leg forward and the left leg straight out behind you, foot flat. You should essentially be sitting on the ball.

Square the hips forward and sweep arms overhead and slightly back. Hold for 3 breaths and then lower the arms and turn the body to the side, stretching through the arms.This is the Warrior II position and you should feel a stretch in the inner thighs.

Hold for 3 breaths.

From there, take the right arm down and place the hand on the floor while stretching the left arm straight up. You should still be supported on the ball. Hold for 3 breaths. Repeat the series on the other side.

Torso Rotation – 

For this one, you’ll be on your hands and knees with the ball next to you. This move is very challenging on the inner thigh, so your ability to do this may depend on how flexible you are.

On the hands and knees, straight the right leg straight out to the side and put the foot on the ball. You should be resting on the left knee, with the right leg straight, the knee facing the front of the room.

If you feel comfortable doing so, gently rotate the spine and take the right arm straight up, turning the head to look up at that hand while the left arm stays on the floor. Hold for 3 breaths and switch sides.

Prone Scissor Kicks – 

For this move start on the knees in front of the ball. Lean forward onto the ball and roll forward until the ball is under the hips and torso and you’re resting on your forearms. Your legs should be straight out behind you.

Keeping the feet flexed, slowly open the legs wide, focusing on the outer thighs. Bring them back together in a scissor motion while keeping the abs contracted. Repeat for 10 reps.

Superman on the ball – 

For this exercise, you’ll be on your hands and knees, but with the ball under you. So, begin kneeling in front of the ball and then lean into the ball and roll forward just a bit until your hands are on the floor as well.

If your ball makes it impossible to but both hands and knees down, try this without the ball.

Lift the left arm straight up and then the right leg and hold for a beat. Lower and repeat on the other side, lifting the right arm and the left leg. Continue, alternating sides for 10-12 reps.

Child’s Pose – 

Kneel in front of the ball and slowly sit back on the heels, hands resting on the ball. As you sit back, roll the ball forward, relaxing the head and stretching through the chest. Shift the hips to the right and gently roll the ball to the left the stretch through the back, repeating on the other side. Hold each stretch for 15 seconds.

Forearm Balance – 

This is another very challenging pose where you’ll be holding your position with only your forearm, hip, and legs.

Start by positioning yourself with the right hip on the ball, upper body resting on the forearm. Your legs should be straight and stacked on top of each other, resting on outside of the left foot.

If you feel able to, find your balance and slowly lift the left leg up while taking the left arm straight up to the sky. Hold for 3 breaths and then repeat on the other side.

Bridge on the Ball – 

Lie on your back resting the feet on the ball with your knees bent. Contract the abs in inhale to slowly roll the spine off the floor, pressing the feet into the ball, and bringing your body into a bridge position. Use your feet to keep the ball from rolling around.

Hold for a beat and then exhale and roll the spine down onto the mat, making continuous contact with each part of the spine. Repeat for 10 reps.

Lying Hip Stretch – 

Lie on your back and rest the right heel on the ball, knee bent at 90 degrees. Cross the left foot over the right knee and use the foot on the ball to gently roll the ball in, pushing out on the left knee to stretch the right hip.

This is similar to a figure 4 stretch, only you’re using a ball.

Hold for 15 seconds and repeat on the other side.


Image result for images of office exerciseImage result for images of office exercise

Click here for Office Workout moves at your desk -

If you have trouble staying fit at work, these office exercises are a great way to keep your body moving right at your desk. The moves here involve stretching and strengthening your body, all within the comfort of your office chair. This workout doesn’t take the place of traditional strength training, but it offers you a way to keep your blood moving if you can’t get away from your desk.

Precautions

See your doctor before trying this workout if you have any injuries, illnesses or other conditions. Make sure the chair you use is stable. If you have wheels, push it against a wall to make sure it won’t roll away.

Equipment Needed

You will need a chair and a full water bottle.

Stretches for your Wrists and Arms – 

Wrist Stretch: Extend an arm in front, palm up and grab the fingers with your other hand. Gently pull the fingers towards you to stretch the forearm, holding for 20-30 seconds. Repeat on the other side.

Wrist and Forearm: Press hands together in front of chest, elbows bent and parallel to the floor. Gently bend wrists to the right and left for 10 reps.

Lower Back Stretch (pictured): Sit tall and place the left arm behind left hip. Gently twist to the left, using the right hand to deepen the stretch, holding for 20-30 seconds. Repeat on the other side.

Lower Body Exercises – 

Hip Flexion: Sit tall with the abs in and lift the left foot off the floor a few inches, knee bent. Hold for 2 seconds, lower and repeat for 16 reps. Repeat on the other side.

Leg Extension: Sit tall with the abs in and extend the left leg until it’s level with hip, squeezing the quadriceps. Hold for 2 seconds, lower and repeat for 16 reps. Repeat on the other side.

Inner Thigh: Place towel, firm water bottle or an empty coffee cup between the knees as you sit up tall with the abs in. Squeeze the bottle or cup, release halfway and squeeze again, completing 16 reps of slow pulses.

Chair Exercises- 

Chair Squat (pictured): While sitting, lift up until your hips are just hovering over the chair, arms out for balance. Hold for 2-3 seconds, stand all the way up and repeat for 16 reps.

Dips: Make sure chair is stable and place hands next to hips. Move hips in front of the chair and bend the elbows, lowering the body until the elbows are at 90 degrees. Push back up and repeat for 16 reps.

One-Leg Squat: Make sure the chair is stable and take one foot slightly in front of the other. Use the hands for leverage as you push up into a one-legged squat, hovering just over the chair and keeping the other leg on the floor for balance. Lower and repeat, only coming a few inches off the chair for 12 reps. Repeat on the other side.

Upper Body Exercises –

Front Raise to Triceps Press: Sit tall with the abs in and hold a full water bottle in the left hand. Lift the bottle up to shoulder level, pause, and then continue lifting all the way up over the head. When the arm is next to the ear, bend the elbow, taking the water bottle behind you and contracting the triceps. Straighten the arm and lower down, repeating for 12 reps on each arm.​

Biceps Curl: Hold a water bottle in right hand and, with abs in and spine straight, curl bottle towards shoulder for 16 reps. Repeat the other side.

Ab Exercises – 

Side Bends: Hold a water bottle with both hands and stretch it up over the head, arms straight. Gently bend towards the left as far as you can, contracting the abs. Come back to center and repeat to the right. Complete 10 reps (bending to the right and left is one rep).

Ab Twists: Hold the water bottle at chest level and, keeping the knees and hips forward, gently twist to the left as far as you comfortably can, feeling the abs contract. Twist back to center and move to the left for a total of 10 reps. Don’t force it or you may end up with a back injury.

Moving More at a Work – 

Beyond working out at your desk, there are a few tricks for staying active at work. Taking the stairs when you can, parking further away from the door and walking around the office when you can are good places to start. Beyond that, there are a few other options to keep you moving:

  • If it’s allowed, sit on an exercise ball instead of a chair. This will strengthen your abs and back and you’ll work on your posture without even trying.
  • Set an alarm to go off every hour to remind you to stand up, stretch, and move around. Even if you just swing your arms or take a deep breath, you’ll feel more alert.
  • Use the restroom on another floor and take the stairs.
  • Use a pedometer or activity monitor and keep track of how many steps you take. Aim for 6,000 to 10,000 steps a day.
  • Leave something important in your car (your lunch, your briefcase, etc.) so you have to run out to get it (and take the stairs).
  • Deliver documents or messages to co-workers in person rather than by email or text.
  • Walk around the parking lot or local mall on your lunch hour.
  • Get a headset for your phone so you can move around while you talk.

Most important, remember that any movement is better than none, so don’t feel like you have to do sprints all day long. Adding short bouts of exercise throughout the day will help you burn more calories and reduce stress.

Making your Office Fitness friendly –

Your boss may not have considered how much more productive his or her employees would be with a little exercise. If you can, encourage your boss to:

  • Work with local gyms to provide membership discounts for employees.
  • Work with local personal trainers to provide monthly seminars or free body fat testing for employees. Some trainers will even do this for free.
  • Set up daily or weekly walks during lunch or after work.
  • Give you extra breaks during the day to take quick walks.
  • Be active. If the boss exercises, employees will take their own health more seriously.

Even if your boss could care less about exercise, you can do a lot to get others involved in working out. Plan lunches where co-workers get together and talk about ways to exercise at work. Get a group together and join a local gym (and see if they’ll give you a group discount). Hire a personal trainer to come and work with you and your co-workers during lunch. Many trainers also offer group discounts. There are any number of ways to encourage fitness in the workplace, so be creative.

Stretches for Office Workers – 

Sitting in front of a computer every day can wreak havoc on your body, especially since most of us don’t have the ideal ergonomic set-up, and stay in the same position for hours at a time. This lack of variation, along with hunching the shoulders and an uncomfortable chair, can cause back pain, headaches, tension, and tightness in your back, neck, and shoulders.

Studies show that regular stretching can help reduce neck and shoulder pain and they also show that regular breaks to stand and stretch increase productivity at the office.

Quick and Easy Stretches – 

Not only do you reduce pain and tension, but those flexibility breaks allow your eyes to rest and your entire body to feel more comfortable.

The following flexibility exercises are designed for office workouts with an emphasis on the neck, back, shoulders, hips, and glutes. Do them as often as you can and you’ll notice less tightness and maybe even more productivity.

How To

  • Set an alarm to go off every 45 to 55 minutes and perform the stretches as shown.
  • Hold each stretch for at least 15 seconds.
  • Avoid any exercises that cause pain or discomfort.
  • Do as many reps as you can and enjoy!

Chest Stretch – 

Stretching the chest and shoulders may be one of the best exercises you can do for your body since most of us spend much of our time hunched forward.

For this exercise, you can use a resistance band and take it overhead. If you don’t have a band, don’t worry. Just lace your fingers together or take the arms straight out to the sides.

You can also find a doorway and put your forearms on either side, gently pressing forward until you feel a stretch in the chest.

Do It Right

In a seated or standing position, take the arms behind you and, if you can, lace your fingers together. Straighten the arms and gently lift your hands up a few inches until you feel a stretch in your chest. Hold for 10 to 30 seconds. Avoid this move if you have shoulder problems.

Shoulder Shrugs – 

The shoulders and neck hold a lot of stress and tension from typing, clicking, and scrunching.

In fact, most of us probably hunch much more than we realize, making the traps and the shoulders muscles tight with tension.

Get the blood moving through your traps and shoulders with shrugs. After typing or working for a long time, this move just feels good.

Do It Right

Seated or standing, lift the shoulders up towards the ears, squeezing them as hard as you can. Hold for 1 to 2 seconds and roll them back as you relax down. Repeat for 8 to 10 reps and then roll the shoulders forward.

Upper Back Stretch – 

While the shoulder shrugs will help get the circulation going, this upper back stretch will get all the muscles between the shoulder blades as well as the traps and the shoulders.

Just think how tight your shoulders and upper back are right now and you’ll make this stretch your go-to stretch all day long.

Do It Right

Seated or standing, stretch the arms straight out and rotate the hands so that the palms face away from each other. Cross the arms so that the palms are pressed together, contract the abs and round the back, reaching away as you relax the head.

Don’t collapse but, instead, imagine you’re curving up and over an imaginary ball. Hold the stretch for 10 to 30 seconds. If twisting the arms doesn’t feel good, simply lace the fingers together.

Spinal Twist – 

Sitting for prolonged periods of time can also affect the lower back, leaving it tight and achy.

This twisting stretch will help gently work out some of that tension. Don’t go too far on this—you only need to rotate a little to feel this stretch.

Do It Right

In a seated position with the feet flat on the floor, contract the abs and gently rotate the torso towards the right, using your hands on the chair handles to help deepen the stretch.

Only twist as far as you comfortably can and keep the back straight while keeping the hips square. Hold for 10 to 30 seconds and repeat on the other side.

Torso Stretch – 

Even if you pay attention to your posture, you may find yourself sinking back into a hunched position, which can make your backache.

This simple move will stretch all the muscles in your back, sides, and arms. You can also take the arms to either side to deepen the stretch down the sides of the torso.

Do It Right

Seated or standing, lace the fingers together and stretch them up towards the ceiling.

Take a deep breath as you stretch up as high as you can, then exhale and open the arms, sweeping them back down. Repeat for 8 to 10 reps.

Forearm Stretch – 

You may not even realize how tight your forearms can get from typing until you stretch them out. This simple move helps stretch those muscles in the forearms and wrists.

Do It Right

Seated or standing, stretch the right arm out and turn the hand down so that the fingers point towards the floor.

Use the left hand to gently pull the fingers towards you, feeling a stretch in the forearm. Hold for 10 to 30 seconds and repeat on the other hand.

Neck Stretch – 

How tight is your neck right now? If you do this neck stretch, you’ll find out.

Holding tension in the neck can lead to headaches and upper back tension as well.

Many of us drop the head forward when working on the computer, which can put extra stress on the neck muscles. ​

Your head can weigh up to 11 pounds (more if you’re smarter!), so just imagine how much stress that puts on your neck.

Do It Right

Sitting in your chair, reach down and grab the side of the chair with the right hand and gently pull while tilting your head to the left, feeling a stretch down the right side of the neck and shoulder. Hold for 10 to 30 seconds and repeat on the other side.

Hip Flexor Stretch – 

The lower body also gets tight from sitting too much, especially the front of the hips.

When you sit, the glutes stretch while the hip flexors are shortened, which creates tightness. Stretching this area several times a day can help reduce that tightness and, plus, it gets you up and out of the chair, which offers some immediate relief.

Do It Right

While standing, take the right leg back a few feet. Bend the back knee, almost like you’re doing a lunge and lower the knees until you feel a stretch in the front of the right hip.

Squeeze the glutes of the back leg to deepen the stretch. Hold for 10 to 30 seconds and repeat on the other side.

Seated Hip Stretch – 

All of the muscles in the thighs get tight from too much sitting and this very simple move helps open up the hips.

This helps stretch the complex series of muscles in the hips and glutes. It feels great after a long day of sitting.

Do It Right

While seated, cross the right ankle over the left knee and sit up nice and tall.

Gently lean forward, keeping the back straight and reaching out with the torso until you feel a stretch in the right glute and hip.

You can also press down on the right knee to deepen the stretch. Hold for 10 to 30 seconds and repeat on the other side. Skip this move if it bothers the knees.

Inner Thigh Stretch – 

This stretch doesn’t look very professional, so you definitely want to do this when no one’s around.

Beyond that, it’s an excellent stretch for the inner thighs, hips, and groin.

This builds on the previous exercise, opening the hips and get rid of tightness and tension in the lower body.

Do It Right

While seated, take the legs wide, toes out and lean forward with the elbows on the thighs. Keep the back straight and the abs contracted.

Gently press forward while using the elbows to push the thighs out until you feel a stretch in the inner thighs. Hold for 10 to 30 seconds and repeat as many times as you like.


Click here for Simple Exercises -

Supermans –  Who doesn’t want to think they have super powers?  Great stretch as well when you picture trying to touch the opposing walls with your fingers and toes.

Starting Position: Lie on your stomach on a mat with your legs extended, ankles slightly plantarflexed (toes pointing away from your shins), arms extended overhead with palms facing each other. Relax your head to align it with your spine.

Upward Phase: Exhale, contract your abdominal and core muscles to stabilize your spine and slowly extend both hips (raise both legs) a few inches off the floor while simultaneously raising both arms a few inches off the floor. Keep both legs and arms extended and avoiding any rotation in each. Maintain your head and torso position, avoiding any arching in your back or raising of your head. Hold this position briefly.

Downward Phase: Gently inhale and lower your legs and arms back towards your starting position without any movement in your low back or hips.

Push-up – The Push-up is an oldie but goodie.  You can modify intensity by changing hand placement.

Starting Position: Kneel on an exercise mat or floor and bring your feet together behind you.

Slowly bend forward to place your palms flat on the mat, positioning your hands shoulder-width apart with your fingers facing forward or turned slightly inward. Slowly shift your weight forward until your shoulders are positioned directly over your hands. Reposition your hands as needed to allow full extension of your body without any bend at the hips or knees. Stiffen your torso by contracting your core/abdominal muscles (“bracing”), your glute and quadriceps muscles and align your head with your spine. Place your feet together with your ankles toes pointed towards your shins.

Downward Phase: Slowly lower your body towards the floor while maintaining a rigid torso and head aligned with your spine. Do not allow your low back to sag or your hips to hike upwards during this downward phase. Continue to lower yourself until your chest or chin touch the mat/floor. Allow your elbows to flare outwards during the lowering phase.

Upward Phase: Press upwards through your arms while maintaining a rigid torso and head aligned with your spine. For extra strength think about pushing the floor away from you. Do not allow your low back to sag or your hips to hike upwards. Continue pressing until the arms are fully extended at the elbows.

An alternative position is to turn your hands to face forwards and keep your elbows close to your sides during the downward phase. This shifts the emphasis from the chest muscles onto the triceps and may reduce stresses in the shoulder joint.

Pushing through the heel and outside surface of your palm provides greater force in your press and stability to your shoulders.

Contralateral Limb Raises – Starting Position: Lie prone (on your stomach) on a mat with your legs extended, ankles slightly plantarflexed (toes pointing away from your shins), arms extended overhead with palms facing each other. Relax your head to align it with your spine.

Upward Phase: Exhale, contract your abdominal/core muscles to stabilize your spine and slowly raise one arm a few inches off the floor keeping your arm extended and avoiding any rotation in your arm. Maintain your head and torso position, avoiding any arching in your back or raising of your head. Hold this position briefly.

Downward Phase: Gently inhale and lower your arm back towards your starting position without any movement in your low back or hips.

Exercise Variation (1): From your starting position, contract your abdominal and core muscles to stabilize your spine and slowly extend one hip (raise one leg) a few inches off the floor keeping your leg extended, ankle plantarflexed (toes pointing away from your shins) and avoiding any rotation in your leg. Maintain your head and torso position, avoiding any arching in your back or raising of your head. Hold this position briefly before returning to your starting position.

Exercise Variation(2): From your starting position, contract your abdominal/core muscles to stabilize your spine and slowly extend one hip (raise one leg) a few inches off the floor while simultaneously raising the opposite arm a few inches off the floor. Keep both your leg and arm extended and avoiding any rotation in each. Maintain your head and torso position, avoiding any arching in your back or raising of your head. Hold this position briefly before returning to your starting position.

Bent Knee Push-up – Starting Position: Kneel on an exercise mat or floor and bring your feet together behind you.

Slowly bend forward to place your palms flat on the mat, positioning your hands shoulder-width apart with your fingers facing forward. Slowly shift your weight forward until your shoulders are positioned directly over your hands. Reposition your hands as needed to allow full extension of your body from the knees without any bend at the hips. Stiffen your torso by contracting your core and abdominal muscles (“bracing”).

Downward Phase: Slowly lower your body towards the floor while maintaining a rigid torso and head aligned with your spine. Do not allow your low back to sag or your hips to hike upwards during this downward phase. Continue to lower yourself until your chest or chin touch the mat or floor. Your elbows should remain close to the sides of your body or flare outwards slightly.

Upward Phase: Press upwards through your arms while maintaining a rigid torso and head aligned with your spine. Do not allow your low back to sag or your hips to hike upwards. Continue pressing until the arms are fully extended at the elbows.

Push-ups place stress upon the wrist joints. To alleviate some of this stress you may opt to use dumbbells and grip the handles rather than place your hands on the floor. If your are pressing from an elevation such as a dumbbell, you do not need to lower your chest or chin to the floor, but rather lower yourself until your chest or chin are level with the dumbbell handles.

Downward facing Dog – Slow and controlled movement very important – wonderful calf stretch.

Starting Position: Kneel on an exercise mat or floor and bring your feet together behind you. Slowly bend forward to place your palms flat on the mat, positioning your hands shoulder-width apart with your fingers facing forward. Slowly lift yourself into a push-up position, shifting your hands until your shoulders are positioned directly over your hands. Reposition your feet as needed to allow full extension of your body. Stiffen your torso by contracting your core and abdominal muscles to prevent any arching in your low back or hiking of your hips towards the ceiling.

Upward Phase: While maintaining a rigid torso and full extension in your arms and legs, slowly exhale and shift your weight backwards by pushing your hips backwards and upwards. Maintain your head alignment with your spine, but slowly move your head between your shoulders as your body moves backwards and attempt to push your heels towards the floor. Maintain the stiffness in your torso to prevent the tendency of your back to arch. Continue moving until your body forms an inverted-V, keeping both arms and legs extended and a neutral (flat) spine. Allow a slight bend in the knees if required to achieve the inverted-V position.

Downward Phase: Inhale and return your body to the starting push-up position, maintaining the alignment of all your body segments.

Bent-Knee Sit-up  / Crunches – Most people don’t know how to perform a proper sit-up/crunch – that is until now.  Core Power!

Starting Position: Lie in a supine (on your back) position on a mat with your knees bent, feet flat on the floor and heels 12 – 18″ from your tailbone.

Place your hands behind your head, squeezing your scapulae (shoulder blades) together and pulling your elbows back without arching your low back. This elbow position should be maintained throughout the exercise. Align your head with your spine, but allow it to move into slight flexion (moving the chin towards the chest) during the upward phase of the exercise.

Upward Phase: Exhale, contract your abdominal and core muscles and flex your chin slightly towards your chest while slowly curling your torso towards your thighs. The movement should focus on pulling your rib cage towards your pelvis (the neck stays relaxed while the chin is tucked towards the neck). Your feet, tailbone and lower back should remain in contact with the mat at all times. Continue curling up until your upper back is lifted off the mat. Hold this position briefly.

Downward Phase: Gently inhale and slowly uncurl (lower) your torso back towards the mat in a controlled fashion keeping your feet, tailbone and low back in contact with the mat.

Proper form is important for this exercise to prevent excessive stress on your low back. Individuals usually perform this movement too rapidly and recruit the hip flexors to assist with the upward phase. This technique tilts the pelvis anteriorly, increasing the stress on the low back and should be avoided. The abdominals connect the rib cage to the pelvis so the movement should focus on bringing these two body parts closer together while keeping the neck and shoulders relaxed.

Push-up with single-leg raise – A great progression from a regular Push-Up but remember to keep proper form.

Starting Position: Kneel on an exercise mat or floor and bring your feet together behind you.

Slowly bend forward to place your palms flat on the mat, positioning your hands shoulder-width apart with your fingers facing forward. Slowly shift your weight forward until your shoulders are positioned directly over your hands. Reposition your hands as needed to allow full extension of your body without any bend at the hips or knees. Stiffen your torso by contracting your core and abdominal muscles (“bracing”) and align your head with your spine. Place your feet together with your ankles dorsiflexed (toes pointed towards your shins).

Downward Phase: Slowly lower your body towards the floor while maintaining a rigid torso and head aligned with your spine. Do not allow your low back to sag or your hips to hike upwards during this downward phase, contract your glutes (butt) and quadriceps (thigh) muscles to create stability for your core. Continue to lower yourself until your chest or chin touch the mat or floor. Your elbows should remain close to the sides of your body or be allowed to flare outwards slightly.

Upward Phase: Press upwards through your arms while maintaining a rigid torso and head aligned with your spine. As your press upwards, extend your left hip to lift your left foot off the floor, keeping the knee extended. Attempt to avoid rotation in your hip as you raise the left leg off the floor. Do not allow your low back to sag or your hips to hike upwards. Continue pressing until the arms are fully extended at the elbows and your left leg is extended off the floor. Hold this position briefly before returning to your starting position. Repeat with your opposite leg

Pushing through the heel and outside surface of your palm provides greater force in your press and stability to your shoulders.

Front Plank – This is harder than it looks!  Your back and abs will love you.

Starting Position: Lie prone (on your stomach) on an exercise mat or floor with your elbows close to your sides and directly under your shoulders, palms down and hands facing forward. Contract your quadriceps to extend your legs and dorsiflex your ankles (pull toes towards your shins). Contract your core and abdominal muscles to stiffen your torso.

Upward Phase : Slowly lift your entire torso off the floor or mat, maintaining a stiff torso and legs. Avoid any arching (sagging) in your low back, hiking (upwards) in your hips or bending in the knees. Avoid shrugging your shoulder and keep your shoulders positioned directly over your elbows with your palms facing down. Continue to breath while holding this position for a specified time (5+ seconds).

Downward Phase: While maintaining a stiff torso and extended knees, gently lower your body back towards the mat or floor before relaxing.

If you experience any pain in the low back with this movement, stop the exercise immediately and consult with your doctor.

Side Plank with Knee bent – Great way to add in hips work without the need for any equipment other than your own body weight.

Starting Position: Lie on your right side on an exercise mat with your left leg lying directly over your right leg and bend your knees to a comfortable position. Raise your upper body to support yourself on your right arm, your right elbow should bend to 90 degrees and be positioned directly under your shoulder. Align your head with your spine and keep your hips and lower knee in contact with the exercise mat.

Upward Phase: Exhale, gently contract your abdominal / core muscles to stiffen your spine and lift your hips off the mat, but keeping contact with your knee, and head aligned with your spine.

Lowering Phase: Inhale and gently return yourself to your starting position.

Exercise Variation: You can increase the exercise intensity by increasing the length of time you are in the raised position.

Spine reverse crunches – Advanced crunch that targets the entire core region.  If you feel pain in your back – STOP.

For variety, convenience, and more structured home exercise, you can’t beat exercise videos. There are workouts for every age, gender, goal and interest and you can workout anytime you like in the privacy of your own home. The best thing about exercise videos: There are thousands upon thousands to choose from, so almost anyone can find a video they like. The worst thing about exercise videos: There are thousands upon thousands to choose from, making the search for the perfect video an overwhelming process.

The Internet may be your favorite way to waste time, but it also offers a wealth of resources for home and/or traveling exercisers. Not all content is created equal on the World Wide Web but, if you know where to look, you can find almost everything you need to know about exercise: How to set up a home gym, create your own exercise program, and learn the basics of cardio, strength training and how to get in shape with exercise.


Image result for images of simple home exercise


Related image


Related image


Related image

Common Health Issues

health problems

One billion people lack access to health care systems. 36 million deaths each year are caused by non-communicable diseases, such as cardiovascular disease, cancer, diabetes, and chronic lung diseases. There are four main types of disease: infectious diseases, deficiency diseases, hereditary diseases (including both genetic diseases and non-genetic hereditary diseases), and physiological diseases.

Health issues mean any physical damage to the body caused by violence or accident or fracture etc. softness, unfitness. poor physical condition; being out of shape or out of condition (as from a life of ease and luxury) condition. an illness, disease, or other medical problems.

A genetic disorder in humans is a genetic problem caused by one or more abnormalities formed in the genome. Most genetic disorders are quite rare and affect one person in every several thousand or millions. … Genetic disorders may be hereditary, meaning that they are passed down from the parents’ genes.

Top 10 Global health threats are  –

  • Air pollution & climate change.
  • Diabetes, cancer, and heart disease (among others).
  • Global influenza pandemic.
  • Fragile, vulnerable regions.
  • Antimicrobial resistance.
  • Ebola & other pathogens.
  • Weak primary health care.
  • Anti-vaccination movement.
  • Dengue.
  • HIV.

Image result for images of common health problems of seniors

Click here for Common Senior Health issues

Because nearly 40% of all deaths can be attributed to smoking, poor exercise habits, inadequate diet, and alcohol misuse, it’s pretty easy to see how you can add years to your life. Don’t smoke, get moving, eat healthy food, and moderate any alcohol consumption. Clearly, healthy behavior choices are one prescription for successful aging.

10 most common health issues –

  • Physical Activity and Nutrition.
  • Overweight and Obesity.
  • Tobacco
  • Drug & Alcohol abuse
  • Immunization
  • HIV/AIDS.
  • Mental Health.
  • Injury and Violence.
  • Environmental Quality.
  • Access to health care.

Mental Wellness – Seniors sometimes find it hard to cope for various reasons. Here are a few of the challenges our patients say they have difficulty facing:

  • Death and loss of family, friends and loved ones
  • Symptoms of depression, such as changes in mood, appetite, sleep patterns, loss of interest in an activity they once enjoyed, lack of energy, and the death wish
  • Anxiety, fears, worries
  • Relationship and family problems
  • Loneliness and feelings of isolation
  • Difficulty remembering
  • Stress and difficulty with changes
  • Physical health problems

Elder abuse –  Hundreds of thousands of seniors are abused, neglected, and exploited by family and others every year. Many of the victims are vulnerable and dependent upon others to meet their basic needs. Who is the abuser? A study of elder abuse found that in the majority of the cases, the abuser is a member of the family. Two-thirds of abusers are adult children or spouses.

The term elder abuse describes one or more of the following activities:

  • Physical abuse means causing pain and/or injury by hurting, restraining, or sexually molesting a senior.
  • Sexual abuse is non-consensual (not agreed to) sexual contact of any kind.
  • Emotional and psychological abuse is causing distress by threatening, intimidating, and/or humiliating behavior.
  • Financial abuse is the use of a senior’s money and resources, without consent, for someone else’s benefit.
  • Neglect is the failure of caretakers to provide necessary goods and services, such as food and medicine.
  • Self-neglect is when an elderly person threatens his or her own health and/or safety in any way.

Sexuality – Contrary to what some may believe, most men and women don’t lose their longing for togetherness or sex as they age. In fact, many seniors report that sexual experiences are enhanced with age. Just think of it. Although safe sex is still recommended for successful aging, there’s no longer a need for contraception, and your kids probably won’t interrupt your intimacy. And regular sexual activity helps maintain successful sexuality.

Signs of elder abuse –

  • Personality changes
  • Whimpering, crying, refusing to talk
  • Unexplained or repeated bruises, fractures, burns, and sores
  • Weight loss
  • Unkempt appearance
  • Poor personal hygiene
  • Dirty, disorganized living space
  • Confusion, excessive sleeping, signs of inappropriate sedation (too much medicine)

Long term care – Most seniors want to age successfully and safely in their own homes. That desire must be weighed against the possible risks. Does the senior have access to caregivers? Can the home be made safe? Even though a move into senior housing requires some personal disruption, senior housing affords a rich social life, nutritious meals, housekeeping, and an end to domestic chores like shoveling the walk and raking the leaves. Friendships, fun exercise programs, and group excursions into the community are part of the active and independent lifestyle found in senior communities.


Click here for Issues Specific to Women's Health

Health issues are specific to women’s health –

While both men and women contract various conditions, some health issues affect women differently and more commonly. Furthermore, many women’s health conditions go undiagnosed and most drug trials do not include female test subjects. Even so, women bear exclusive health concerns, such as breast cancer, cervical cancer, menopause, and pregnancy. Women’s Depression and anxiety exhibit more frequently among female patients. Urinary tract conditions present more often in females, and sexually transmitted diseases can cause more harm to women. Among the conditions that present most frequently in women, the following eight illnesses pose considerable health risks.

Heart Disease

In the United States, heart disease causes one in every four deaths among women. Although the public considers heart disease a common issue among men, the condition affects males and females nearly equally. Yet, only 54 percent of women realize that heart disease is the top health condition threatening their gender.

Breast Cancer

Breast cancer, which typically originates in the lining of the milk ducts, can spread to other organs and is the most aggressive cancer affecting the global female population. The condition presents more among female populations in developed nations due to their extended life spans.

Initially, women afflicted with breast cancer may develop breast lumps. Most breast lumps are non-threatening, but it is important for women to have each one checked by a care provider.

Ovarian and Cervical Cancer

Many people are not aware of the differences between ovarian and cervical cancer. Cervical cancer originates in the lower uterus, while ovarian cancer starts in the fallopian tubes. While both conditions cause similar pain, cervical cancer also causes discharge and pain during intercourse. While ovarian cancer presents extremely vague symptoms, the condition is very complex.

Gynaecological Health

Bleeding and discharge are a normal part of the menstrual cycle. However, added symptoms during menstruation may indicate health issues, and unusual symptoms, such as bleeding between menstruations and frequent urinating, can mimic other health conditions.

Vaginal issues could also indicate serious problems such as sexually transmitted diseases (STDs) or reproductive tract cancer. While care providers might treat mild infections easily, if left unchecked, they can lead to conditions such as infertility or kidney failure.

Pregnancy Issues

Pre-existing conditions can worsen during pregnancy, threatening the health of a mother and her child. Asthma, diabetes, and depression can harm the mother and child during pregnancy if not managed properly.

Pregnancy can cause a healthy mother’s red blood cell count to drop, a condition called anemia, or induce depression. Fortunately, obstetricians can manage and treat common and rare health issues that emerge during pregnancies.

Autoimmune Diseases

Autoimmune disease occurs when body cells that eliminate threats, such as viruses, attack healthy cells. As this condition continues to escalate among the population, researchers remain baffled as to why the condition affects mostly women. While many distinct autoimmune diseases exist, most share symptoms such as:

  • Exhaustion
    ● Mild fever
    ● Pain
    ● Skin irritation
    ● Vertigo

Most of the autoimmune system rests in the stomach. Duly, many who suffer from this condition have resorted to natural healing practices, such as:

  • Consuming less sugar
    ● Consuming less fat
    ● Lowering stress
    ● Reducing toxin intake

However, the best defense against autoimmune disease is early detection.

Osteoporosis – Osteoporosis weakens bones, allowing them to break easily. Several factors can cause the condition that occurs mostly in women, such as:

● Alcohol consumption
● Certain prescriptions
● Genetics and age
● Lack of exercise
● Low body mass
● Smoking
● Steroid use

To detect the condition, care providers measure bone density using an X-ray or ultrasound diagnostic. While no cure exists for osteoporosis, care providers can prescribe treatment to impede illness progression, which might include dietary supplements, healthy lifestyle choices, or prescription medication.

Depression and Anxiety

Natural hormonal fluctuations can lead to depression or anxiety. Premenstrual syndrome (PMS) occurs commonly among women, while premenstrual dysmorphic disorder (PMDD) presents similar, but greatly intensified, symptoms. Shortly after birth, many mothers acquire a form of depression called the “baby blues,” but perinatal depression causes similar – but much stronger – concerns, emotional shifts, sadness, and tiredness. Perimenopause, the shift into menopause, can also cause depression. No matter how intense the symptoms, care providers can provide relief with a prescription or therapeutic treatments.

Health Technology for Women

Soon, new technologies will emerge to assist care providers in treating women’s health conditions. Researchers have developed innovative medical treatments, such as a patient operated device that prepares women for breast reconstruction using carbon dioxide instead of needles and a blood test that can detect whether gestation has started outside of the fallopian tubes. Other developing medical technologies include an at-home, do-it-yourself Pap smear, and a test that determines pregnancy using saliva as a sample.

Women can lower the risk of cancers and other common illnesses with healthy habits and regular care provider visits. However, in many underserved communities, nurse practitioners (NPs) and nurse midwives fill the shortage created by lack of care providers, while covering service areas encompassing far too many clients.

Click here for Common Health Problems for Children

While health issues for children tend to be different than those for adults, there are some problems that are common for children you should be aware of.

During infancy and the preschool years, the average child gets seven or eight colds a year. During the school-age years, the average five or six colds a year. With some colds lasting upwards of a week, it can often feel like you’re constantly facing sickness. Especially when that sickness generously makes its way through the entire family.

The frequency of childhood sickness boils down to the fact there are more than 200 viruses that can cause the common cold. As children have not yet had exposure to many of these germs, they’re quite susceptible to catching each and everyone they come into contact with.

But on top of colds, there are many other illnesses that are common in children.

Respiratory syncytial Virus ((RSV) – is the most common cause of breathing and respiratory infections in children, with children under two years of age being the most susceptible. RSV causes infection of the lungs and breathing passages.

In most cases, the symptoms are relatively minor and mirror those of a cold. But for premature babies and children with a compromised immune system, a congenital heart condition, or chronic lung disease, it can quickly become serious and cause either bronchiolitis or pneumonia.

Most likely this will occur during winter or early spring. It’s spread when an infected person talks, coughs, or sneezes small droplets containing infectious agents into the air. It is also spread via contact with the hands, tissues, and other articles soiled by infected nose and throat discharges. The virus survives only a few hours outside of the body and is easily killed by soap and water or disinfectants.

Ear Infection – are common in small children, but often resolve on their own, and children grow up to have healthy ears and normal hearing. There are 2 types of ear infections that children commonly contract: middle and outer ear infections. Depending on the age of the child, ear infections clear up on their own without antibiotics, however, it is important to speak to your doctor for the proper course of action.

Signs and Symptoms –

  • Trouble hearing;
  • Pulling on their ear;
  • A child has become irritable due to the pain;
  • Vomiting, loss of appetite, lethargy, and fever;

Gastroenteritis – Gastroenteritis is a bowel infection that causes inflammation of the stomach and intestines, which leads to diarrhea and sometimes vomiting. The vomiting may stop quickly, but diarrhea can last for up to ten days. Gastro can be caused by many different germs, although the most common cause of gastro is a viral or bacterial infection.

Gastro will cause your child to feel unwell and they may not want to eat or drink. Vomiting may occur in the first 24 to 48 hours and will be accompanied by stomach pains and maybe a fever. Young babies and children can become dehydrated quickly, therefore if they show any signs of dehydration (drowsiness, not waking for feeds) they will need to be checked by a doctor.

Hand Foot and Mouth Disease (HFM) – Hand, foot, and mouth disease is a usually mild virus that is common in children. Caused by a virus, it can cause blisters on the hands and feet, in the mouth, and often in the nappy area. Symptoms can last around seven to ten days.

HFMD can be spread easily between children. The infection is spread by direct contact with fluid from the skin blisters, nose and throat discharges, droplets, and feces. Good personal hygiene is important to prevent the spread of infection to others. The blisters will remain infectious until they become crusty and there is no more fluid in them. The virus can be shed in the feces for several weeks after the blisters have gone. Children should stay home from school until the blisters and fever have completely cleared up.

It is important to monitor your child’s illness and consult a doctor if symptoms escalate.

Symptoms of Serious Diseases and Health Problems –

When is a cough “just” a cough, or a headache a symptom to be concerned about? Listed are signs and symptoms that could indicate a serious health condition, and you should see a doctor if you experience any symptoms of concern. Sometimes, a symptom in one part of the body may be a sign of a problem in another part of the body. Moreover, unrelated symptoms that might be minor on their own could be warning signs of a more serious medical disease or condition. Listen to your body, note all symptoms, and share them in detail with your doctor.

  • Signs of a heart attack include pain, pressure, squeezing, or feeling of fullness in the center of the chest that lasts more than a few minutes; pain or discomfort in other areas of the upper body; shortness of breath; cold sweat; nausea; or lightheadedness.
  • Signs of a stroke include facial drooping, arm weakness, difficulty with speech, rapidly developing dizziness or balance, sudden numbness or weakness, loss of vision, confusion, or severe headache.
  • Symptoms of lung problems include coughing up blood, shortness of breath, difficulty breathing, chronic cough, repeated bouts of bronchitis or pneumonia, and wheezing.
  • Symptoms of the stomach or digestive problems include rectal bleeding, blood in the stool or black stools, changes in bowel habits or not being able to control bowels, constipation, diarrhea, heartburn, or acid reflux, or vomiting blood.
  • Symptoms of bladder problems include difficult or painful urination, frequent urination, loss of bladder control, blood in urine, waking frequently at night to urinate or wetting the bed at night, or leaking urine.
  • Symptoms of skin problems include changes in skin moles, frequent flushing and redness of face and neck, jaundice, skin lesions that don’t go away or heal, new growths or moles on the skin, and thick, red skin with silvery patches.
  • Symptoms of muscle or joint problems include persistent muscle pains and body aches that are persistent, for example, numbness or tingling; pain, tenderness, stiffness, swelling, inflammation, or redness in or around joints; and decreased range of motion or loss of function of any joints or muscles.
  • Symptoms of emotional problems include anxiety, depression fatigue, feeling tense, flashbacks and nightmares, disinterest in regular activities, suicidal thoughts, hallucinations, or delusions.
  • Symptoms of headache problems (not including everyday tension headaches) include headaches that come on suddenly, “the worst headache of your life,” and headache associated with severe dizziness, nausea, vomiting, and inability to walk.
  • Symptoms of eating or weight problems include extreme thirst, dehydration, excessive hunger, losing weight without trying, binging, vomiting, starvation, preoccupation with food and weight, distorted body image, compulsive exercise, abuse of laxatives or diet pills, and depression.

Click here for Adolescents Health Risks

Around 1.2 billion people, or 1 in 6 of the world’s population, are adolescents aged 10 to 19. Most are healthy, but there is still substantial premature death, illness, and injury among adolescents. Illnesses can hinder their ability to grow and develop to their full potential. Alcohol or tobacco use, lack of physical activity, unprotected sex and/or exposure to violence can jeopardize not only their current health, but also their health as adults, and even the health of their future children.

Promoting healthy behaviors during adolescence, and taking steps to better protect young people from health risks are critical for the prevention of health problems in adulthood, and for countries’ future health and ability to develop and thrive.

Health Issues –

Injuries – Unintentional injuries are the leading cause of death and disability among adolescents. In 2016, over 135 000 adolescents died as a result of road traffic accidents. Many of those who died were “vulnerable road users”, including pedestrians, cyclists, or users of motorized two-wheelers. In many countries, road safety laws need to be made more comprehensive, and enforcement of such laws needs to be strengthened.

Drowning is also among the top 10 causes of death among adolescents – nearly 50 000 adolescents, over two-thirds of them boys, are estimated to have drowned in 2016. Teaching children and adolescents to swim is an essential intervention to prevent these deaths.

Mental Health – Depression is one of the leading causes of illness and disability among adolescents, and suicide is the second leading cause of death in adolescents. Violence, poverty, humiliation, and feeling devalued can increase the risk of developing mental health problems.

Violence – Interpersonal violence is the third leading cause of death in adolescents, globally, though its prominence varies substantially by world region. It causes nearly a third of all adolescent male deaths in low- and middle-income countries of the WHO Region of the Americas. Globally, nearly one in three adolescent girls aged 15 – 19 years (84 million) has been a victim of emotional, physical, and/or sexual violence perpetrated by their husband or partner.

HIV/AIDS – An estimated 2.1 million adolescents were living with HIV in 2016; the great majority in the WHO African Region. Although the overall number of HIV-related deaths has been decreasing since the peak in 2006, estimates suggest that this is not yet the case among adolescents. This reflects the fact that most of today’s adolescents were born before the prevention of mother-to-child transmission of HIV by antiretroviral therapy became widespread. However, a substantial proportion of HIV-positive adolescents are unaware of their status, and many of those who are aware of their status do not receive effective, long-term antiretroviral treatment.

Other Infectious Disease – improved childhood vaccination, adolescent deaths, and disability from measles have fallen markedly. Diarrhea and lower respiratory tract infections are estimated to be among the top 10 causes of death for 10–19-year-olds. These two diseases, along with meningitis, are all among the top five causes of adolescent death in African low- and middle-income countries.

Early Pregnancy and Childbirth – The leading cause of death for 15-19-year-old girls globally is complications from pregnancy and childbirth. Some 11% of all births worldwide are to girls aged 15–19 years and the vast majority of these births are in low- and middle-income countries.

Alcohol and Drugs – Harmful drinking among adolescents is a major concern in many countries. It reduces self-control and increases risky behaviors, such as unsafe sex or dangerous driving. It is an underlying cause of injuries (including those due to road traffic accidents), violence, and premature deaths. It can also lead to health problems in later life and affects life expectancy.

Drug use among 15–19-year-old is also an important global concern. Drug control may focus on reducing drug demand, drug supply, or both, and successful programs usually include structural, community, and individual-level interventions.

Nutrition and micronutrient deficiencies Iron deficiency anemia was the second leading cause of years lost by adolescents to death and disability in 2016. Iron and folic acid supplements are a solution that also helps to promote health before adolescents become parents.

Undernutrition and obesity – Many boys and girls in developing countries enter adolescence undernourished, making them more vulnerable to disease and early death. At the other end of the spectrum, the number of adolescents who are overweight or obese is increasing in low-, middle- and high-income countries. Globally, in 2016, over one in six adolescents aged 10–19 years were overweight.

Tobacco use – The vast majority of people using tobacco today began doing so when they were adolescents. Globally, at least 1 in 10 adolescents aged 13 to 15 years uses tobacco, although there are areas where this figure is much higher. Cigarette smoking seems to be decreasing among younger adolescents in some high-income countries.


International Yoga Day 2019

Image result for yoga day images

International Yoga day

International Yoga Day

International Yoga Day

21st June is celebrated as International Yoga Day. Although its International Day but India is the only country where millions of people celebrate across India from the Himalayas, Siachen Glacier to Kerala, and from west to east.
No other Country celebrates International Yoga day as much as India except few instances in some countries.
In this post, we have more pictures since Yoga is all about different poses.
Yoga is like music,
The rhythm of the body,
The melody of the mind and
Harmony of the soul that creates the symphony of life.
Yoga is not just doing some exercise, it is much more. It is to expand your awareness, sharpen your intellect, and expand your intuitive ability.
Add years to your life and life to your years just by embracing yoga in your life.
Yoga is 99% practice and 1% theory.
Have a healthy Yoga Day!
Join hands with yoga to disconnect with stress, diseases, and dull life…
Let’s make a posture and not a pose.
Yoga is the journey, of the self through the self, to the self.
Whatever you do in life, Yoga shows you how to do it better.
Yoga teaches us to cure what need not be endured and endure what cannot be cured.
Yoga is that light, which, if you can lit once; will never get dimmed, the more you practice, the brighter the flame will be.
Become friends with happiness and health with yoga and meditation….
Join hands with yoga to disconnect with stress, diseases, and dull life….
Free from illness, a path to wellness that is the path of yoga.
Yoga is the fountain of youth. You are only young as your spine is flexible.
From Dehradun to Dublin, Shanghai to Chicago, Jakarta to Johannesburg yoga has become a positive influence in the lives of millions.
Yoga is the 5000-year-old Indian physical, mental and spiritual practice that aims to transform the body and mind
“When this body has been so magnificently and artistically created by God, it is only fitting that we should maintain it in good health and harmony by the most excellent and artistic science of Yoga.” Happy International Yoga Day!  
“Yoga is the journey of the self, through the self, to the self.” — Bhagavad Gita
Yoga is invigoration in relaxation, freedom in routine, confidence through self-control, the energy within, and energy without.” — Ymber Delecto

“True yoga is not about the shape of your body, but the shape of your life. Yoga is not to be performed; yoga is to be lived. Yoga doesn’t care about what you have been; yoga cares about the person you are becoming. Yoga is designed for a vast and profound purpose, and for it to be truly called yoga, its essence must be embodied.”

The theme for this year is “Yoga for heart care” Prime Minister Modi on Yoga day.

  • Heart care has become a challenge all over the world.
  • I urge you all to embrace Yoga and make it an integral part of your daily routine. Yoga is ancient and modern. It is constant and evolving. For centuries, the essence of yoga has remained the same.
  • Yoga provides a perfect bend of gyaan and knowledge, bhakti, and devotion.
  • Yoga can help prevent heart diseases.
  • Let this year’s motto be: Yoga for peace, harmony, and progress.
Related image
  World Yoga Day celebration in Capital of India
Indian Army celebrate Yoga day on the icy heights of Himalayan ranges
NH photo by Pramod Pushkarna
CISF Jawans at a Yoga day event in New Delhi
 PTI Photo
                        Indian Army Jawans perform Yoga at Siachen Glacier at an altitude of 20,000 feet.
Major Yoga styles and their benefits
Hatha Yoga Physical and mental strength
Asthanga Yoga Weight loss, overall fitness
Bikram Yoga Proper alignment and joint flexibility
Vinyasa Yoga Synchronises body movement with breathing
Power Yoga Strength and flexibility
Kundalini Yoga Spiritual and physical well being
Iyengar Yoga Stability, Mobility, Strength, and Flexibility
Restorative Yoga Low paced: for stress-related illness
Kripalu Yoga Relaxation, Spiritual well being
Ashtanga Yoga: Ashtanga Yoga is the most ancient and traditional form of the practice, comprising eight parts that must be followed. These help in the overall development of the mind, body, and soul and are believed to be a vehicle to help achieve salvation. These are:
  • Yama, or following moral codes.
  • Niyama, or self-study and purification.
  • Asana, or posture.
  • Pranayama, or breath control.
  • Pratyahara, or sense control.
  • Dharana, or concentration.
  • Dhyana, or meditation.
  • Samadhi, or absorption into the universe.
  • Karma Yoga: Karma Yoga is the practice of meditating and completing tasks solely for the journey of completing them without any attachment to the end result. This practice, achieved through Seva, or service to the society, involves putting in 100 percent effort only to feel the joy of serving others, rather than to achieve a goal.
  • Jnana Yoga: Jnana Yoga is the approach of attaining salvation through logic and rational thinking. To practice this form of yoga, one must gain practical knowledge as purely theoretical knowledge is not sufficient. Jnana Yoga can be practiced by learning and reflecting on yogic teachings and meditating on these to attain salvation.
  • Bhakti Yoga: This form involves using every aspect of the body both mind and spirit to offer undying devotion to the divine entity that the practitioner believes in. Bhakti Yoga is considered a means of prayer and the ultimate goal of union with God. It can be practiced through chanting, poses, and prayers.
  • Mantra Yoga: As the name suggests, this is a method of practicing yoga by chanting a mantra. Mantras act as a signpost to discipline a wandering mind. By engaging completely in mantras, one can connect closely with the divinity within. To correctly perform this form of yoga, the mantra must be recited in a specific meter. Silently recalling the mantra while meditating is considered the most effective way to invoke it.
  • Tantra Yoga: Sexuality is a common misconception associated with Tantra Yoga. In reality, this form of the practice actually involves weaving together five “bodies”:
  • The Physical Body.
  • The Energetic Body.
  • The Emotional Body.
  • The Wisdom Body.
  • The Bliss Body.

The amalgamation of these, along with the weaving together of various forms of yoga, is believed to help one achieve eternal bliss. This form of yoga also provides an opportunity to meditate with one’s partner, thus strengthening their bond.

Hatha Yoga: Hatha Yoga is a method of pushing one’s physical limits to gain information and attain enlightenment. Through yoga asanas, one becomes more enhanced and closer to achieving enlightenment. Indian yogi Jaggi Vasudev said, “Hatha Yoga is the phenomenon of aligning the human system with the cosmic  a way to hold one’s system in a way that it will become a receptacle to receive and hold the entire cosmos.”

Modern forms of yoga:

Vinyasa Yoga: Although Vinyasa Yoga is generally considered a separate form of yoga, many practitioners find it an essential component of the practice and believe that without it, the poses will have no real benefits. The fluid, continuous transition between the various poses, consisting mainly of the Surya Namaskar, or sun salutation, is believed to help bring balance to one’s life.

Iyengar Yoga: This form of yoga, popularised by yoga practitioner BKS Iyengar, follows the traditional ‘Eight-Fold Path of Yoga’. It was devised to include various props, such as belts and ropes, to help achieve “perfection” while performing the asana. Practitioners believe that regular practice of this technique helps unite the mind, body, and soul.

Bikram Yoga: Otherwise known as ‘Hot Yoga’, this is a popular form of modern yoga made famous by Bikram Choudhury. This version includes 26 poses designed to stretch the muscles, ligaments, and tendons, usually performed in a hot room.

Jivamukti Yoga: Jivamukti Yoga is based on the belief that enlightenment should come from compassion towards all other organisms. It encompasses five major beliefs:

  • Ahimsa. or non-violence.
  • Bhakti. or devotion to god.
  • Dhyana, or meditation.
  • Nada, or development of a sound body and mind through listening.
  • Shastra, or the study of ancient yogic teachings.

Power Yoga: Considered to be the most common form of modern yoga, this form of yoga was devised keeping masses, specifically in the United States, in mind. Power Yoga combines the spiritual teachings of yoga with fast-paced movements, leading to a strengthened body and peaceful mind. This style of yoga has become so popular that it is now among the most common group physical activity in the US.

Sivananda Yoga: Swami Sivananda propagated this form of yoga, and his disciples spread the practice. It played an instrumental role in making yoga an internationally appreciated practice during its first wave of popularity. It consists of five major principles: Asana, or exercise, focusing on 12 main poses –

    • Pranayama, or proper breathing.
    • Savasana, or proper relaxation.
    • Vegetarianism.
    • Vedanta and Dhyana, or positive thinking and concentration.

    Yin Yoga: Yin Yoga is a passive, relaxing form of modern yoga. Although not as commonly practiced as the other forms of modern yoga, it is a unique technique. Instead of dynamic poses, Yin Yoga includes the performance of more passive poses, many of which involve lying on the ground. It is used frequently along with medical practices to treat mental and psychological conditions such as addiction, depression, and eating disorders. It is beneficial in calming and bringing about balance and energy regulation in the body.

  • Yoga Poses for Healthy spine

Related image

Advanced Yoga poses

Image result for images of yoga poses

Advanced Yoga

Related image   
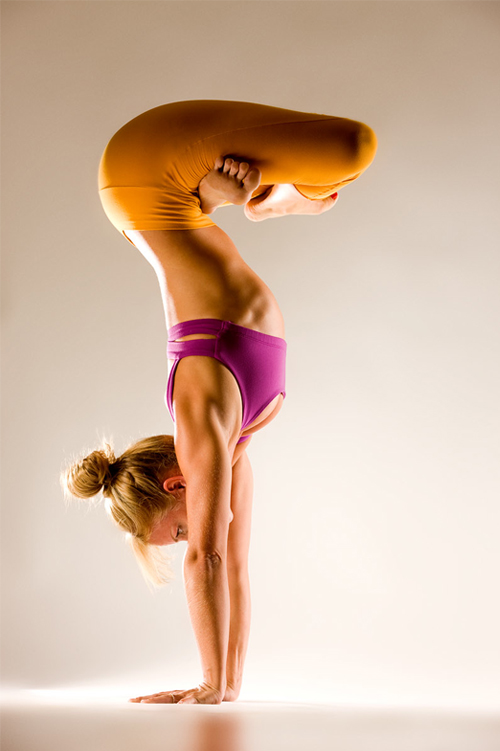
Hand Stand – The Prayer Twist

Related image

Advanced pose – Uttanasana

Related image

Advanced Yoga – The Scorpion pose

  • Image result for yoga day images
Image result for yoga day images
Image result for yoga day quotes
Related image
Image result for yoga day quotes
Image result for images of yoga day celebrations in 2019

International Health Days

inernational health days

International Health days

One of the biggest tools we have to fight health conditions is the power of human connection. That’s why awareness months, weeks, and days are so important: They rally us together to spread awareness and show support.

Educational and fundraising events are often held at these times to create a ripple effect of positivity and empowerment for not only those living with health conditions but their loved ones, too.

Whether you are taking the kids to be vaccinated, talking to students on the devastating health effects of tobacco, organizing a mobile blood collection in your community, or contributing to the online conversation through social media, you can play a part in these worldwide efforts to create a healthier world.

Keep track of the events you’re passionate about — and discover some new ones, too — with this annual calendar of health awareness events.

January

  • Cervical Health Awareness Month.
  • National Birth Defects Prevention Month.
  • National Glaucoma Awareness Month.
  • National Radon Action Month.
  • National Stalking Awareness Month.
  • National Winter Sports Traumatic Brain Injury (TBI) Awareness Month.
  • Thyroid Awareness Month.
  • National Folic Acid Awareness Week (Jan. 7–13).
  • National Drug and Alcohol Facts Week (Jan. 22–27).

February.

  • AMD./Low Vision Awareness Month.
  • American Heart Month.
  • International Prenatal Infection Prevention Month.
  • National Children’s Dental Health Month.
  • Teen Dating Violence Awareness Month.
  • African Heritage and Health Week (first week of February).
  • National “Wear Red” Day for women’s heart health (Feb. 1).
  • Give Kids a Smile Day (Feb. 1).
  • World Cancer Day (Feb. 4).
  • Congenital Heart Defect Awareness Week (Feb. 7–14).
  • National Donor Day (Feb. 14).
  • Condom Week (Feb. 14–21).
  • Eating Disorders Awareness and Screening Week (Feb. 25–March 3).

March

  • Multiple Sclerosis Education and Awareness Month.
  • National Bleeding Disorders Awareness Month.
  • National Colorectal Cancer Awareness Month.
  • National Endometriosis Awareness Month.
  • National Kidney Month.
  • National Nutrition Month.
  • National Traumatic Brain Injury Awareness Month.
  • Save Your Vision Month.
  • Trisomy Awareness Month.
  • World Kidney Day (March 14).
  • World Sleep Day (March 15).
  • National School Breakfast Week (March 4–8).
  • National Women and Girls HIV/AIDS Awareness Day (March 10).
  • Patient Safety Awareness Week (March 10–16).
  • National Sleep Awareness Week (March 3–10).
  • Brain Awareness Week (March 11–17).
  • National Poison Prevention Week (March 17–23).
  • National Native American HIV/AIDS Awareness Day (March 20).
  • World Tuberculosis Day (March 24).
  • American Diabetes Alert Day (March 26).
  • Purple Day for epilepsy awareness (March 26).

April

  • Alcohol Awareness Month.
  • Irritable Bowel Syndrome (IBS) Awareness Month.
  • National Autism Awareness Month.
  • National Child Abuse Prevention Month.
  • National Donate Life Month.
  • National Facial Protection Month.
  • National Minority Health Month.
  • National Sarcoidosis Awareness Month.
  • Occupational Therapy Month.
  • Oral Cancer Awareness Month.
  • Sexual Assault Awareness and Prevention Month.
  • Sexual Assault Awareness Month.
  • STD Awareness Month.
  • Women’s Eye Health and Safety Month.
  • National Public Health Week (April 1–7).
  • National Alcohol Screening Day (April 11).
  • Rape, Abuse, and Incest National Network (RAINN) Day (April 5).
  • World Health Day (April 7).
  • National Youth Violence Prevention Week (April 8–12).
  • National Youth HIV/AIDS Awareness Day (April 10).
  • National Infertility Awareness Week (April 21–27).
  • Every Kid Healthy Week (April 22–26).
  • World Meningitis Day (April 24).
  • National Infant Immunization Week (April 26–May 3).

May

  • American Stroke Awareness Month.
  • Arthritis Awareness Month.
  • Better Hearing and Speech Month.
  • Clean Air Month.
  • Cystic Fibrosis Awareness Month.
  • Food Allergy Action Month.
  • Global Employee Health and Fitness Month.
  • Healthy Vision Month.
  • Hepatitis Awareness Month.
  • International Mediterranean Diet Month.
  • Lupus Awareness Month.
  • Melanoma/Skin Cancer Detection and Prevention Month.
  • Mental Health Month.
  • National Asthma and Allergy Awareness Month.
  • National Celiac Disease Awareness Month.
  • National High Blood Pressure Education Month.
  • National Osteoporosis Awareness and Prevention Month.
  • National Physical Fitness and Sports Month.
  • National Teen Pregnancy Prevention Month.
  • Ultraviolet Awareness Month.
  • National Physical Education and Sport Week (May 1–7).
  • World Hand Hygiene Day (May 5).
  • North American Occupational Safety and Health Week (May 5–11).
  • National Stuttering Awareness Week (May 5–11).
  • Cornelia de Lange Syndrome Awareness Day (May 11).
  • National Women’s Health Week (May 12–18).
  • National Alcohol- and Other Drug-Related Birth Defects Awareness Week (May 12–18).
  • HIV Vaccine Awareness Day (May 18).
  • National Asian and Pacific Islander HIV/AIDS Awareness Day (May 19).
  • World Autoimmune Arthritis Day (May 20).
  • Don’t Fry Day (May 24).
  • World Digestive Health Day (May 29).
  • National Senior Health Fitness Day (May 29).

June

  • Alzheimer’s and Brain Awareness Month.
  • Cataract Awareness Month.
  • Hernia Awareness Month.
  • Men’s Health Month.
  • Myasthenia Gravis Awareness Month.
  • National Aphasia Awareness Month.
  • National Congenital Cytomegalovirus Awareness Month.
  • National Safety Month.
  • National Scleroderma Awareness Month.
  • Scoliosis Awareness Month.
  • National Cancer Survivors Day (June 2).
  • World environment day ( June 4 ).
  • Men’s Health Week (June 10–16).
  • World Sickle Cell Day (June 19).
  • World Yoga day ( June 21).
  • Helen Keller Deaf-Blind Awareness Week (June 23–29).
  • PTSD Awareness Day (June 27).

July

  • Cord Blood Awareness Month.
  • International Group B Strep Throat Awareness Month.
  • Juvenile Arthritis Awareness Month.
  • National Cleft and Craniofacial Awareness and Prevention Month.
  • World Hepatitis Day (July 28).

August

  • Children’s Eye Health and Safety Month.
  • Gastroparesis Awareness Month.
  • National Breastfeeding Month.
  • National Immunization Awareness Month.
  • Psoriasis Awareness Month.
  • World Breastfeeding Week (Aug. 1–7).
  • National Health Center Week (Aug. 4–10).

September

  • Blood Cancer Awareness Month.
  • Childhood Cancer Awareness Month.
  • Healthy Aging Month.
  • National Atrial Fibrillation Awareness Month.
  • National Childhood Obesity Awareness Month.
  • National Cholesterol Education Month.
  • National Food Safety Education Month.
  • National ITP Awareness Month.
  • National Pediculosis Prevention Month/Head Lice Prevention Month.
  • National Preparedness Month.
  • National Recovery Month.
  • National Sickle Cell Month.
  • National Yoga Awareness Month.
  • Newborn Screening Awareness Month.
  • Ovarian Cancer Awareness Month.
  • Pain Awareness Month.
  • Polycystic Ovary Syndrome (PCOS) Month.
  • Prostate Cancer Awareness Month.
  • Sepsis Awareness Month.
  • Sexual Health Awareness Month.
  • Sports Eye Safety Month.
  • World Alzheimer’s Month.
  • Usher Syndrome Awareness Day (third Saturday).
  • National Suicide Prevention Week (Sept. 8–14).
  • World Suicide Prevention Day (Sept. 10).
  • World Sepsis Day (Sept. 13).
  • National Celiac Disease Awareness Day (Sept. 13).
  • National HIV/AIDS and Aging Awareness Day (Sept. 18).
  • National School Backpack Awareness Day (Sept. 18).
  • Falls Prevention Day (Sept. 23).
  • Malnutrition Awareness Week (Sept. 23–27).
  • National Women’s Health and Fitness Day (Sept. 25).
  • Sport Purple for Platelets Day (Sept. 27).
  • World Rabies Day (Sept. 28).
  • Family Health and Fitness Day (Sept. 28).
  • World Heart Day (Sept. 29).

October

  • Domestic Violence Awareness Month.
  • Eye Injury Prevention Month.
  • Health Literacy Month.
  • Healthy Lung Month.
  • Home Eye Safety Month.
  • National ADHD Awareness Month.
  • National Breast Cancer Awareness Month.
  • National Bullying Prevention Month.
  • National Dental Hygiene Month.
  • National Down Syndrome Awareness Month.
  • National Medical Librarians Month.
  • National Physical Therapy Month.
  • Pregnancy and Infant Loss Awareness Month.
  • Spina Bifida Awareness Month.
  • Sudden Infant Death Syndrome (SIDS) Awareness Month.
  • World Cerebral Palsy Day (Oct. 6).
  • Mental Illness Awareness Week (Oct. 6–12).
  • World Mental Health Day (Oct. 10).
  • National Depression Screening Day (Oct. 10).
  • Bone and Joint Health National Action Week (Oct. 12–20).
  • Metastatic Breast Cancer Awareness Day (Oct. 13).
  • International Infection Prevention Week (Oct. 13–19).
  • Pregnancy and Infant Loss Awareness Day (Oct. 15).
  • National Latino AIDS Awareness Day (Oct. 15).
  • World Food Day (Oct. 16).
  • World Pediatric Bone and Joint Day (Oct. 19).
  • Respiratory Care Week (Oct. 20–26).
  • National Health Education Week (Oct. 21–25).
  • National Health care Quality Week (Oct. 20–26).
  • International Stuttering Awareness Day (Oct. 22).
  • World Psoriasis Day (Oct. 29).

November

  • American Diabetes Month.
  • Bladder Health Month.
  • Chronic Obstructive Pulmonary Disease (COPD) Awareness Month.
  • Diabetic Eye Disease Month.
  • Lung Cancer Awareness Month.
  • National Alzheimer’s Disease Awareness Month.
  • National Epilepsy Awareness Month.
  • National Family Caregivers Month.
  • National Healthy Skin Month.
  • National Hospice Palliative Care Month.
  • National Stomach Cancer Awareness Month.
  • Pancreatic Cancer Awareness Month.
  • Prematurity Awareness Month.
  • World Prematurity Day (Nov. 17).
  • Great American Smoke out Day (Nov. 21).
  • International Survivors of Suicide Day (Nov. 23).
  • GERD Awareness Week (Nov. 24–30).
  • National Family Health History Day (Nov. 28).

December

  • World AIDS Day (Dec. 1).
  • National Handwashing Awareness Week (Dec. 1–7).

Related image


Sure, you’ve heard about the bigger awareness campaigns like Breast Cancer Awareness Month and World AIDS Day. But what about lesser-known ones, such as National Family Health History Day, Give Kids a Smile Day, or National Mediterranean Diet Month?

World Cancer Day 04-02- 04-02-
International Epilepsy Day 11-02- 11-02-
International Childhood Cancer Day 15-02- 15-02-
Colorectal Cancer Awareness Day 01-03- 01-03-
World Hearing Day 03-03- 03-03-
World Kidney Day 14-03- 14-03-
World Oral Health Day 20-03- 20-03-
World Down Syndrome Day 21-03- 21-03-
World Tuberculosis (TB) Day 24-03- 24-03-
World Autism Awareness Day 02-04- 02-04-
World Health Day 07-04- 07-04-
World Immunization Week 24-04- 30-04-
World Malaria day 25-04- 25-04-
World Asthma Day 07-05- 07-05-
World Thalassemia Day 08-05- 08-05-
World Hypertension Day 17-05- 17-05-
World MS Day 30-05- 30-05-
World No Tobacco Day 31-05- 31-05-
World Blood Donor Day 14-06- 14-06-
World Sickle Cell Day 19-06- 19-06-
World Hepatitis Day 28-07- 28-07-
World Breastfeeding Day 01-08- 01-08-
World First Aid Day 14-09- 14-09-
World Alzheimer’s Day 21-09- 21-09-
World Heart Day 29-09- 29-09-
Breast Cancer Awareness Month 01-10- 31-10-
International Day of Older Persons 01-10- 01-10-
World Sight Day 10-10- 10-10-
World Mental Health Day 10-10- 10-10-
World Obesity Day 11-10- 11-10-
World Arthritis Day 12-10- 12-10-
Global Handwashing Day 15-10- 15-10-
International Infection Prevention Day 16-10- 16-10-
World Osteoporosis Day 20-10- 20-10-
Lung Cancer Awareness Month 01-11- 30-11-
World Antibiotic Awareness Week 12-11- 18-11-
World Diabetes Day 14-11- 14-11-
World Prematurity Day 17-11- 17-11-
World COPD Day 20-11- 20-11-
World Children’s Day 20-11- 20-11-
World AIDS Day 01-12- 01-12-
International Day of Persons with Disabilities 03-12- 03-12-

Image result for images of international health day


Image result for images of international health day


Image result for images of international health day

Image result for images of international health day

Related image


Related image